
- May 29, 2024
- Posted by: Anisha P
- Categories: Airbyte, Snowflake
Introduction:
Snowflake is a leading cloud data platform known for its scalability, performance, and ease of use. Google Analytics, on the other hand, is a powerful tool widely used for tracking and analyzing website traffic, user behaviour, and marketing effectiveness. Integrating data from Google Analytics into Snowflake allows organizations to centralize their data, perform advanced analytics, and derive valuable insights.
In this blog, we will explore the process of ingesting data from Google Analytics to Snowflake using Airbyte. Airbyte is an open-source data integration platform that simplifies the process of moving data between different sources and destinations. By leveraging Airbyte’s intuitive interface and pre-built connectors, users can set up data pipelines quickly and efficiently.
Prerequisites:
- Snowflake account
- Google Analytics (GA4)
- Airbyte
To set data stream in GA4:
A data stream must be set up in GA4 to enable data collection for a website/iOS/app. For this use case, we are trying to measure behavioural data of the Squarespace website.
1. Create an account in Google Analytics (https://analytics.google.com/analytics/web)
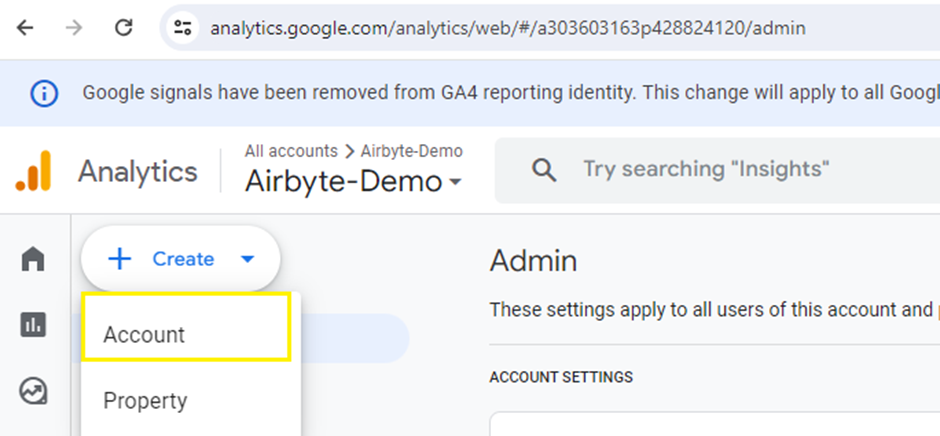
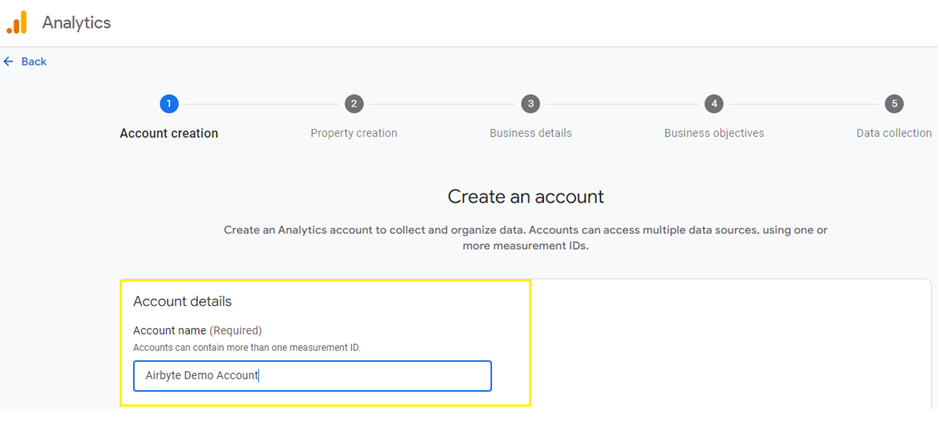
2. Enter preferred name for the account.
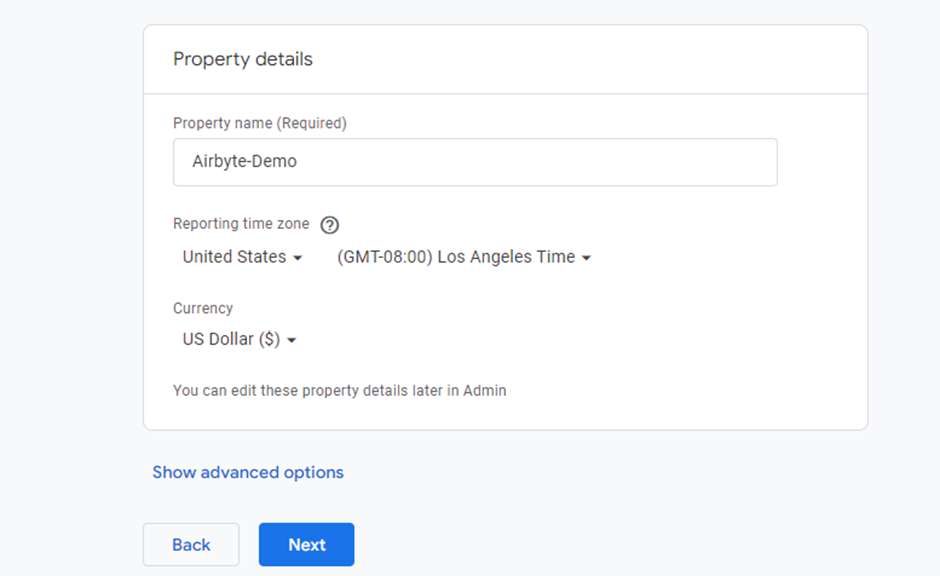
3. To measure your web and app data, create a Google Analytics 4 property. Each property you create holds all your measurement data for any selection of websites and apps you choose.
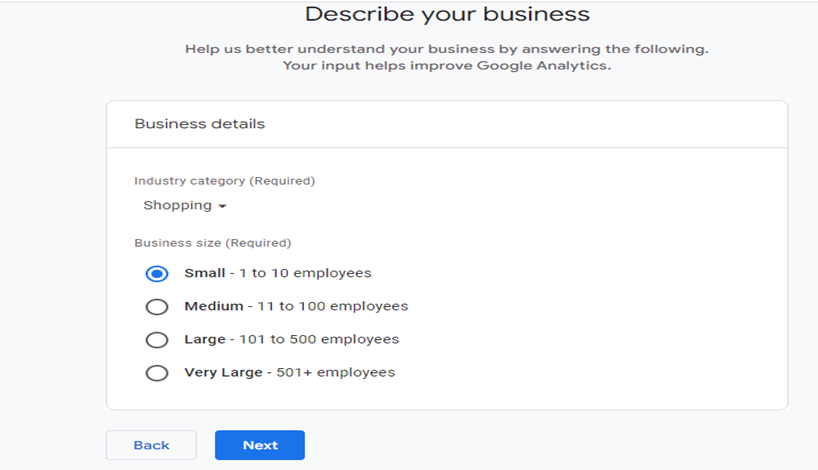
4.Enter the business details.
5. Choose business objectives and click create, to set up a GA4 account with property id.
6. To set up data collection for your website or app, choose from where you will be collecting data (the Web, an Android app, or an iOS app). In this case choose web platform.
7. Enter the URL of website and provide a stream name.
8. On creating the stream, a measurement id corresponding to the stream will be generated.
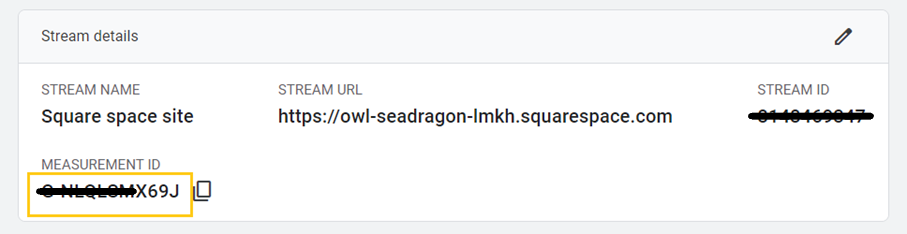
9. Add the data collection tag to that source. Go to Web Stream Details, Manage connected site tags and add the measurement id and click connect.
10. Implement google tag for the data stream. Select the Square space platform and enter the URL of the website. Now the data stream is set up for Squarespace website.
Connection to square space site:
- Click the copy icon to copy your tag ID.
- Sign in to your Squarespace account.
- On the “Dashboard”, choose the site you want to modify.
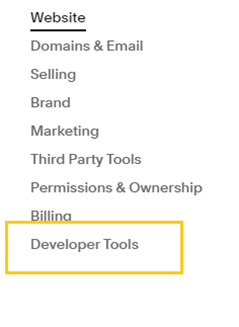
- From the main menu, click Settings.
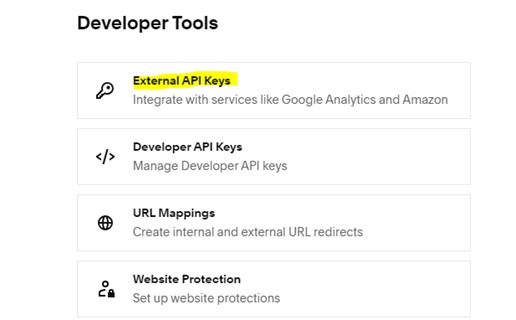
- Navigate to Developer Tools
- Select External API Keys.
- Paste your tag ID.
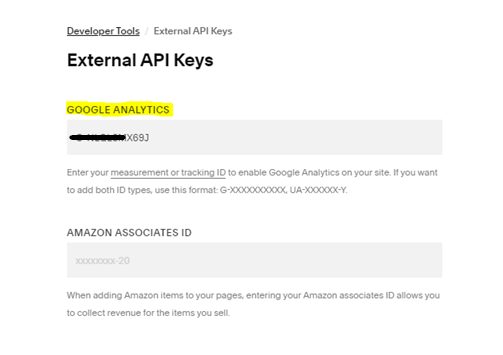
- Click Save.
Data is now flowing in the Data Stream:
We should now be able to access all the behavioural data of Squarespace site. User acquisitions, User behaviour, demographic details, etc. Please note that it would take minimum 24 hours for the data stream to start collecting the data.
Data Integration via Airbyte:
Step 1: Set up the source connector in Airbyte.
- From the Airbyte UI, click the Sources tab, then click + New source
- Select Google Analytics 4(GA4) from the list of available sources.
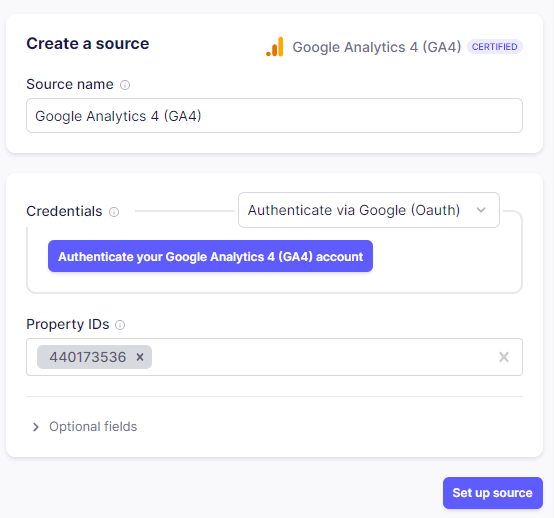
- Enter the preferred source connector name and for credentials choose ‘Authenticate via Google (Oauth)’. On entering the property id click ‘Authenticate your Google Analytics 4 (GA4) Account’. This will navigate to authentication portal where, choose the email with which account is created. Click on set up source and now the source connector is configured.
Step 2: Setup destination connector.
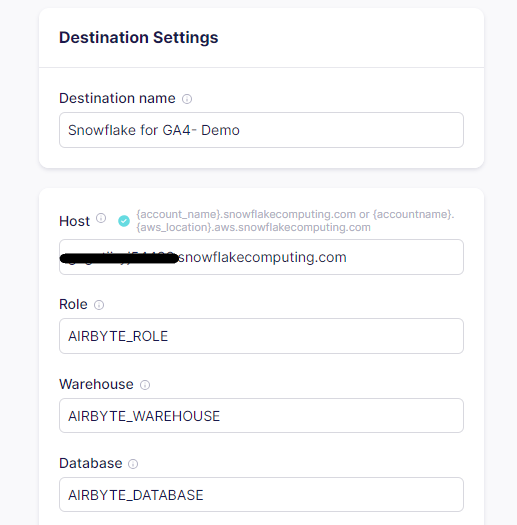
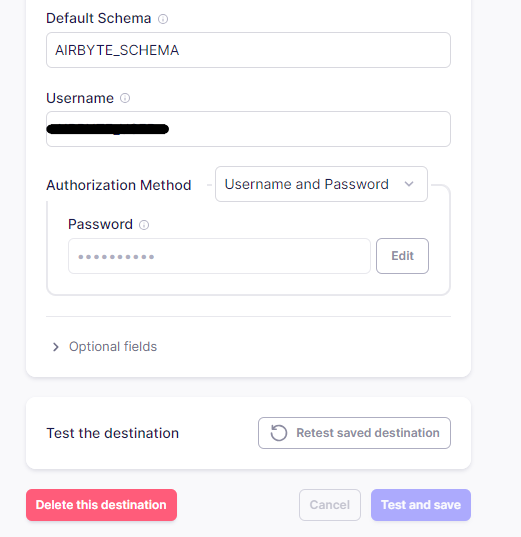
- From the Destination tab, + New destination and select snowflake from the list of available sources.
- Enter the details of account identifier in the Host, Role, Warehouse, Database, Schema and User credentials. Make sure that the user has OWNERSHIP permission to write data into Snowflake, track costs pertaining to Airbyte, and control permissions at a granular level. After configuring, test the destination connector.
Step 3: Set up Connection.
- Click the new connection in Connection tab.
- Choose the GA4 source connector created.
- Choose the Snowflake destination connector created.
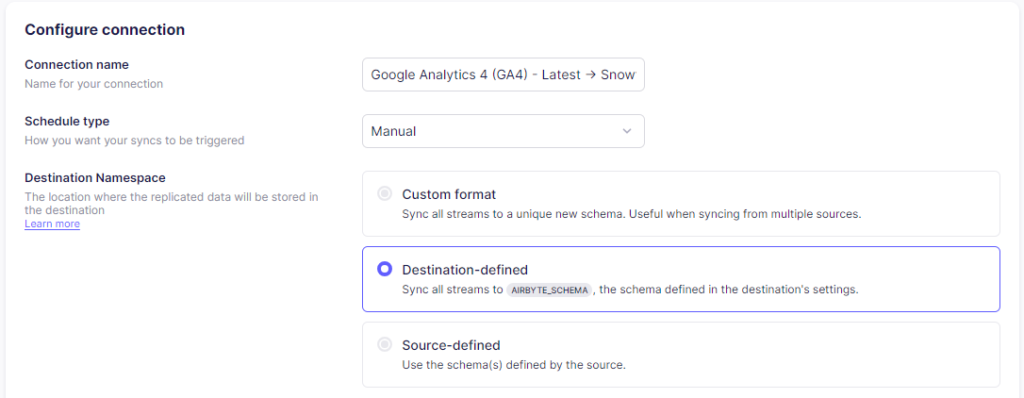
Step 4: Configure the connection.
- Enter the preferred connection name and data residency.
- Enter the preferred Schedule type, Destination Namespace, Destination Stream Prefix and Detect and propagate schema changes. Destination Namespace is the target schema into which the data is to be replicated.
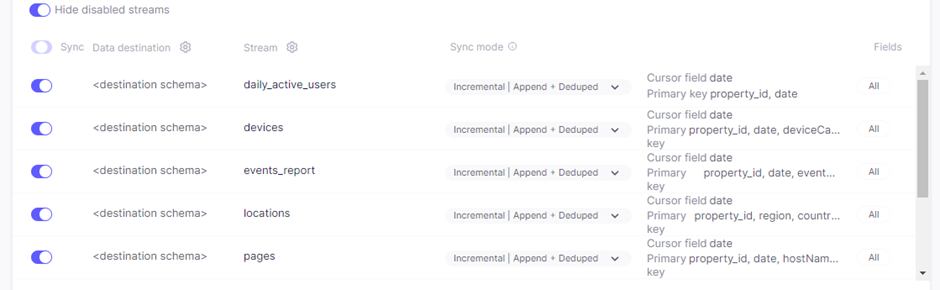
- Enable the streams which needs to be synced and click set up connection.
Step 5: Sync data from GA4 to Snowflake:
Select the connection created and click ‘sync now’ to let the connection sync data from the GA4 to Snowflake.

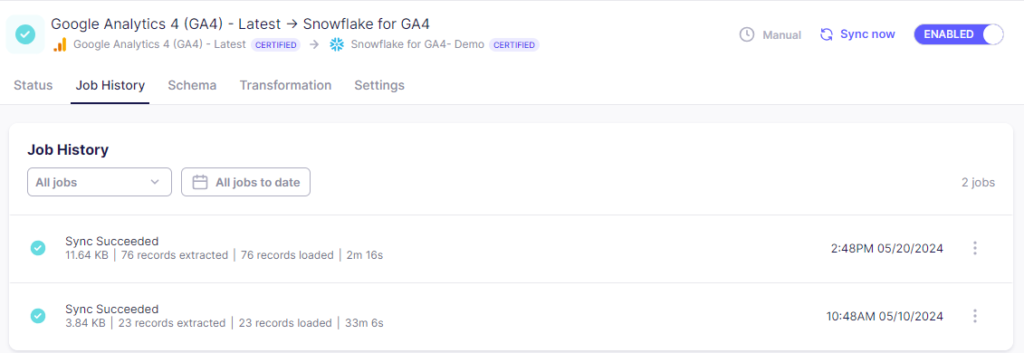
Step 6: Check the status of the job.
Check the status of the connection.
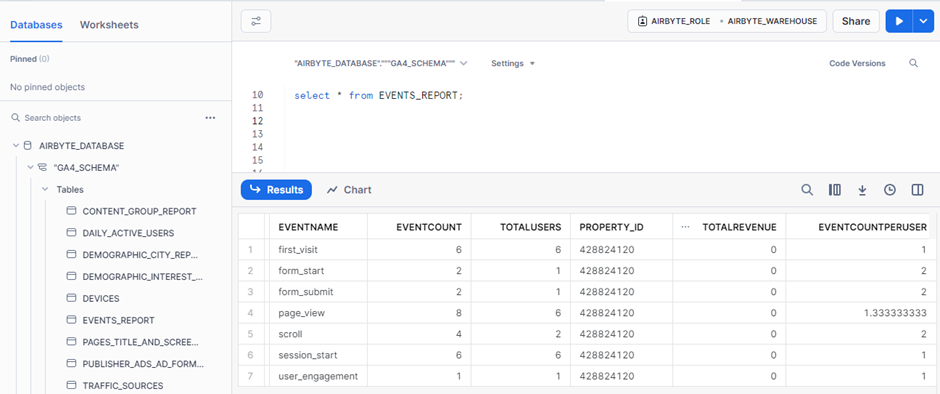
Step 7: Verify data in snowflake.
Conclusion:
The above procedure gives an understanding of how to leverage Airbyte to seamlessly integrate data from Google Analytics into Snowflake, empowering them to unlock the full potential of their data and drive actionable insights.
Cittabase excels in modern data platform deployments and is a proud Airbyte partner. Feel free to reach out for your data integration needs using Airbyte.