
- March 19, 2024
- Posted by: Kousalya P, Akshaya G
- Categories: Cloud Datawarehouse, Snowflake
Introduction:
Snowpipe enables loading data from files as soon as they are available in a stage. This implies that instead of manually running COPY statements on a schedule to load larger batches, you may load data from files in micro-batches and make it available to users in a matter of minutes.
This topic provides instructions for triggering Snowpipe data loads automatically using Microsoft Azure Event Grid messages for Blob storage events.
Prerequisites:
- Snowflake Account
- Microsoft Azure Account
Overview:
Step 1: Create a Cloud Storage Integration in Snowflake
Step 2: Grant Snowflake Access to the Storage Locations
Step 3: Create an External Stage
Step 4: Azure Queue creation setup
Step 5: Setup for Continuous data ingestion
Step 6: Create a Snowpipe
Step 1: Create a Cloud Storage Integration in Snowflake
Create a storage integration using the CREATE STORAGE INTEGRATION command. A storage integration is a Snowflake object that stores a generated service principal for your Azure cloud storage, along with an optional set of allowed or blocked storage locations.
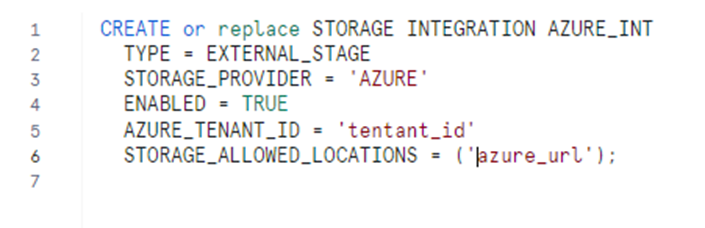
Tenant id can find in tenant properties.
To get the URL, Storage Account – > container -> container Properties -> copy the URL.
URL contains below info:
azure://<account>. blob.core.windows.net/<container>/<path>/
Step 2: Grant Snowflake Access to the Storage Locations
1.Execute the DESCRIBE INTEGRATION command to retrieve the Azure consent URL.

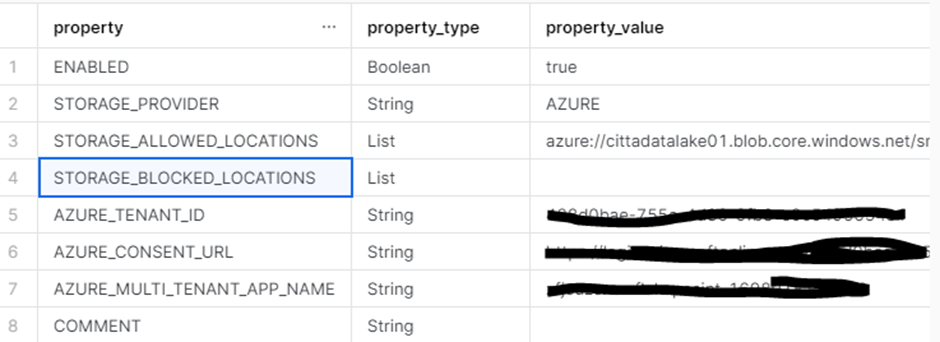
2.In a web browser, navigate to the URL in the AZURE_CONSENT_URL column. The page displays a Microsoft permissions request page.
3.Click the Accept button. This action allows the Azure service principal created for your Snowflake account to be granted an access token on specified resources inside your tenant.
4.Next, Log into the Microsoft Azure portal and Navigate to Azure Services » Storage Accounts. Click on the name of the storage account you are granting the Snowflake service principal access to.
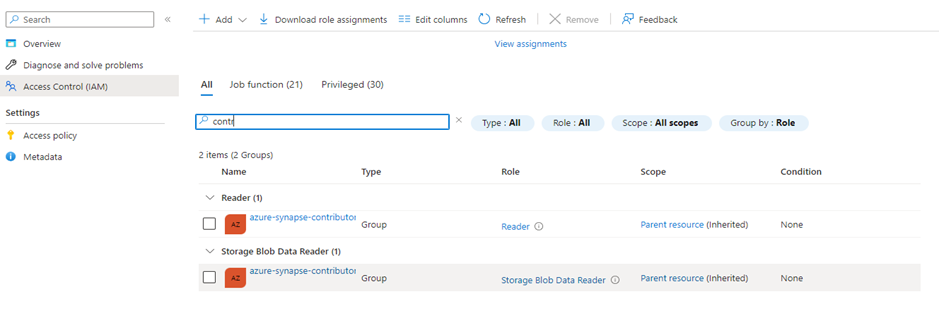
5.Click Access Control (IAM) » Add role assignment.
6.Select the desired role to grant to the Snowflake service principal.
7.Search for the Snowflake service principal. This is the identity in the AZURE_MULTI_TENANT_APP_NAME property in the DESC STORAGE INTEGRATION output. Search for the string before the underscore in the AZURE_MULTI_TENANT_APP_NAME property.
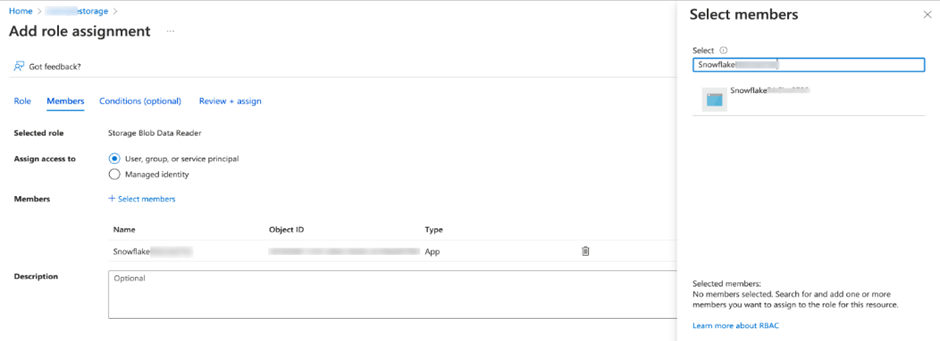


8.Click the Review + assign button.
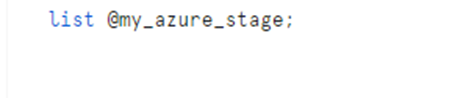
Step 3: Create an External Stage
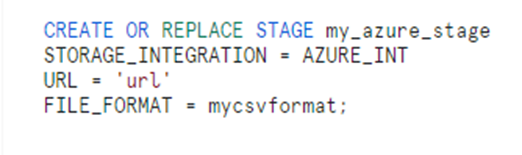
Once created the stage, run the below script to list the files in the azure container.
Step 4: Azure Queue creation setup:
From the below steps, we can create the event subscription using queue for the Azure blob storage and it got triggered when the files got uploaded in the blob storage and send the notification to snowflake.
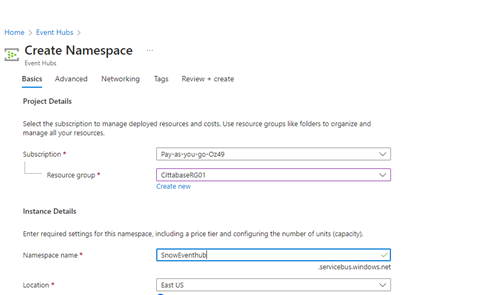
1.Event hubs – > create namespace -> event hub
- Create Name space by navigate to the Event Hub and click on create.
- Give the resource group name you have created.
- Give the name space name and choose the pricing tier if your using trial account no need.
- Review and create the name space.
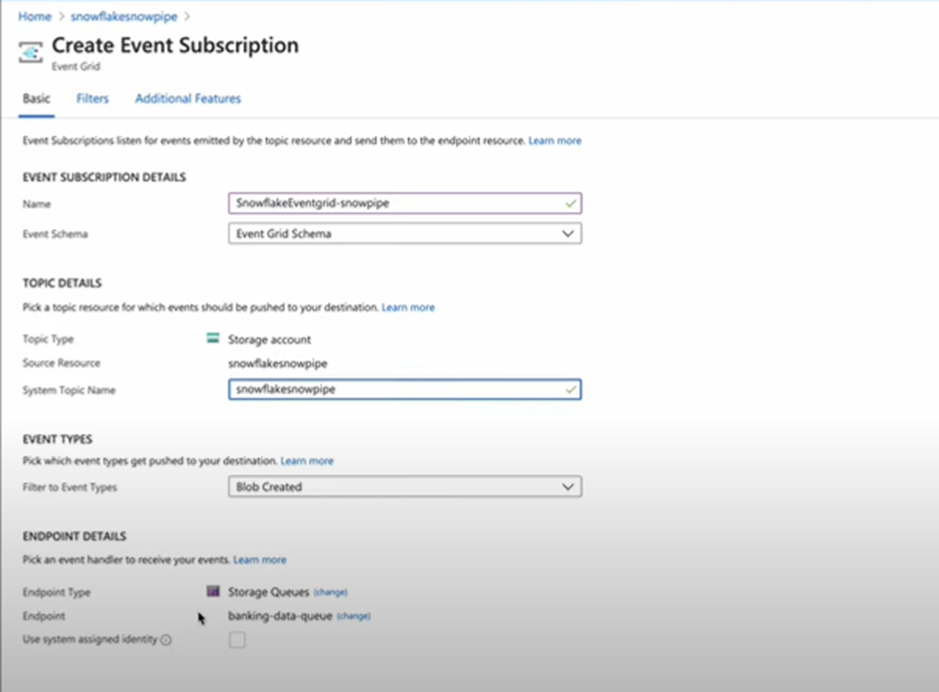
2. Event grid subscription inside container
- Navigate to Storage Account – > create Event Subscription
- Create an event by using the created event option.
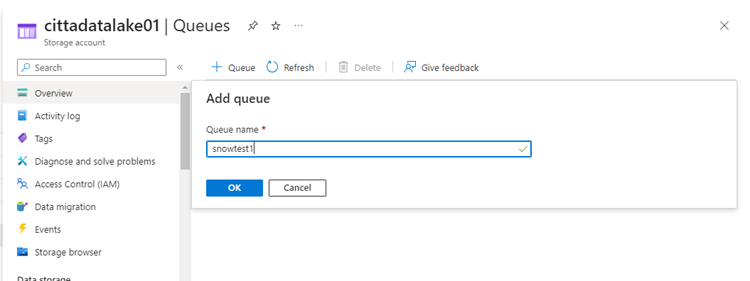
4. Event subscription for queue
- Create queues inside the container.
- Queue name should be in lowercase.
5. Give queue Account control
- Give storage data contributor access to the snowflake account created in snowflake.
- Add the snowflake member and review/Assign.
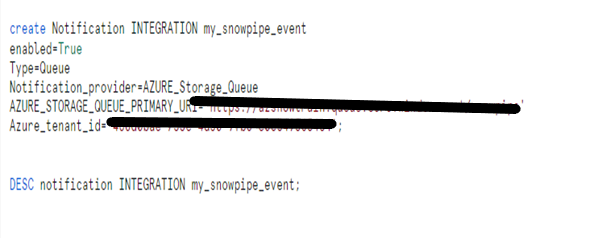
Once the queue creation is done, copy the URL and tenant id from Azure by using the properties tab, where you can find the details of URL and Tenant ID.
Step 5: Setup for Continuous data ingestion:
Create a notification integration in Snowflake.
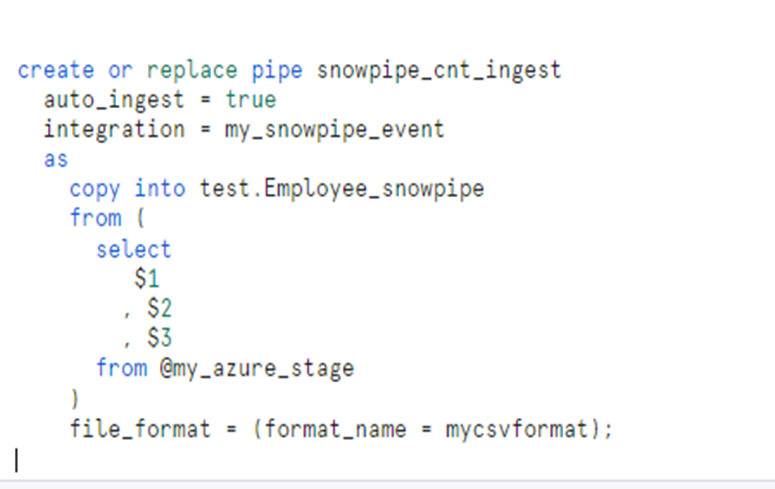
Step 6: Create a Snowpipe
Pipe creation for continuous data integration to get the data once file placed in the Azure location. Make sure auto_ingest = true for continuous data integration.
- After Pipe has been created, load the sample file into Azure blob storage.
- Make sure your pipe is not suspended by using describe pipe command.
- If suspended ALTER PIPE <PipeName> SET PIPE_EXECUTION_PAUSED = false to resume the Pipe. Once the file landed into Blog storage Event will be triggered and send the notification to snowflake and snowpipe will be executed.
Conclusion:
By following the above procedures data can be loaded using snowpipe from Azure.
Cittabase is a select partner with Snowflake. Please feel free to contact us regarding your Snowflake solution needs. Our snowflake solutions encompass a suite of services for your data integration and migration needs. We are committed to providing personalized assistance and support customized to your requirements.