
- March 19, 2024
- Posted by: Reshma M
- Categories:
Introduction :
Snowpipe enables loading data from files as soon as they’re available in a stage. This means you can load data from files in micro-batches, making it available to users within minutes, rather than manually executing COPY statements on a schedule to load larger batches.
This blog focus on Data ingestion from AWS Cloud Storage into Snowflake table through the Snowpipe.
Prerequisites:
The first step is setting up an account on these platforms If you don’t have one.
Here are the links for signing up for the trial account:
- AWS –https://aws.amazon.com/console/
- Snowflake – https://signup.snowflake.com/
Steps to follow:
- Create S3 bucket in the AWS account and upload files.
- Create IAM role to access the bucket in AWS account.
- Create Policies in AWS.
- Create storage integration and exchanging ARN between two accounts.
- Create External stage and Snowpipe in snowflake account.
- Configure event notification in the AWS account.
Creating S3 Bucket in AWS and upload files:
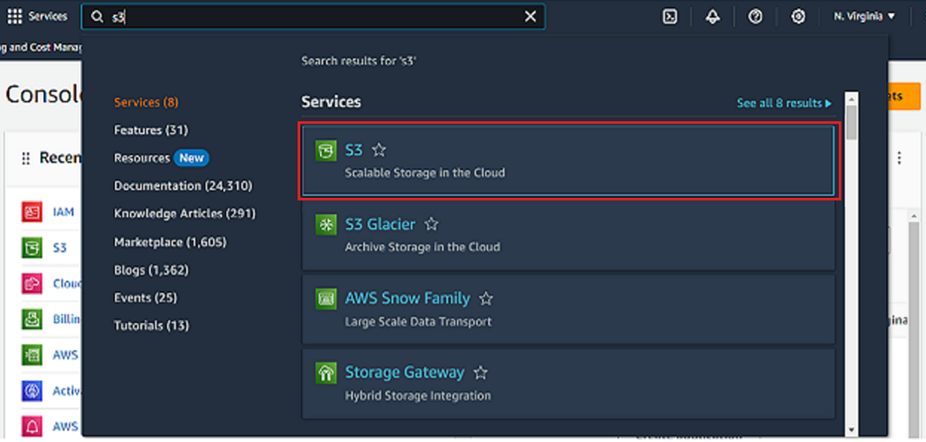
- Once the account setup is done in AWS, Login into AWS, In the search bar Go to S3.
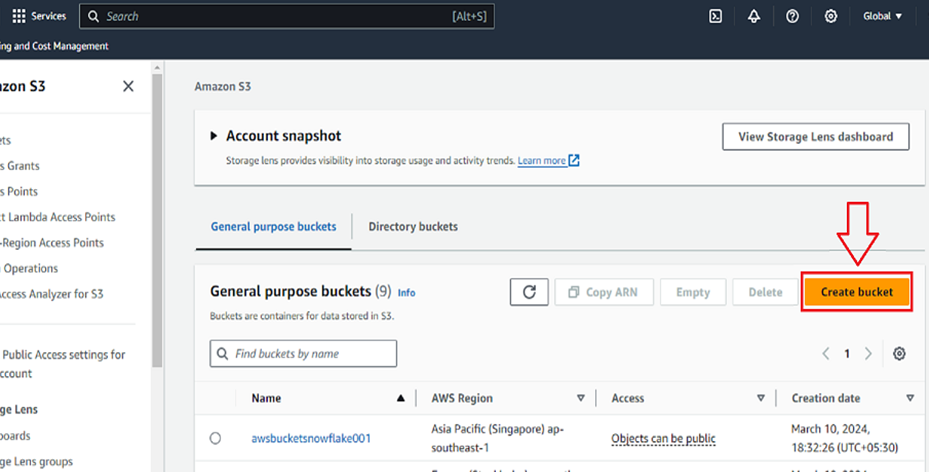
- Select create bucket option.
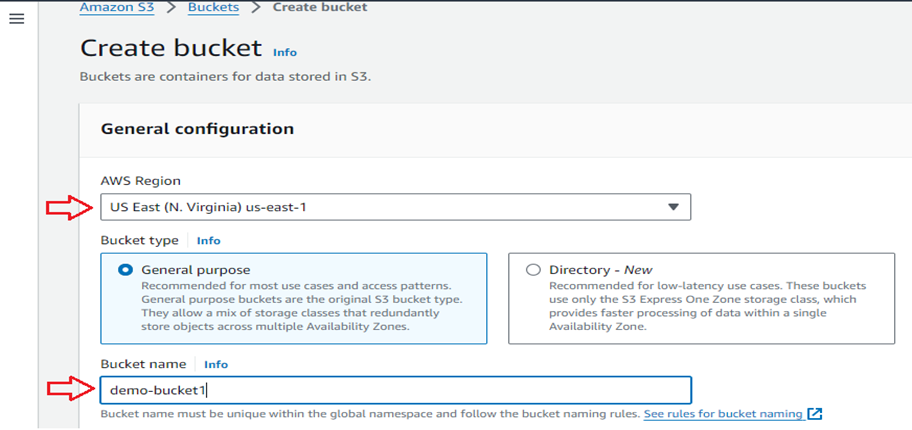
- Specify the bucket name and AWS region for your bucket.
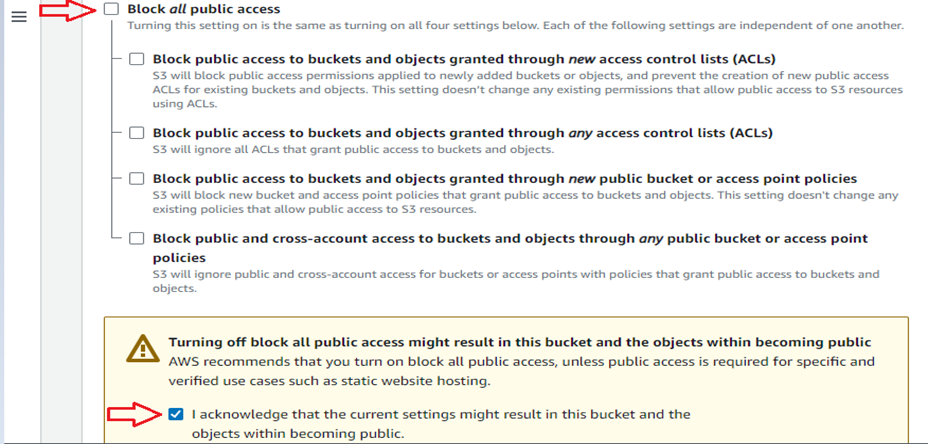
- Scroll down and uncheck the “Block all public access” option and check “I acknowledge that the current settings might result in this bucket and the objects within becoming public.”
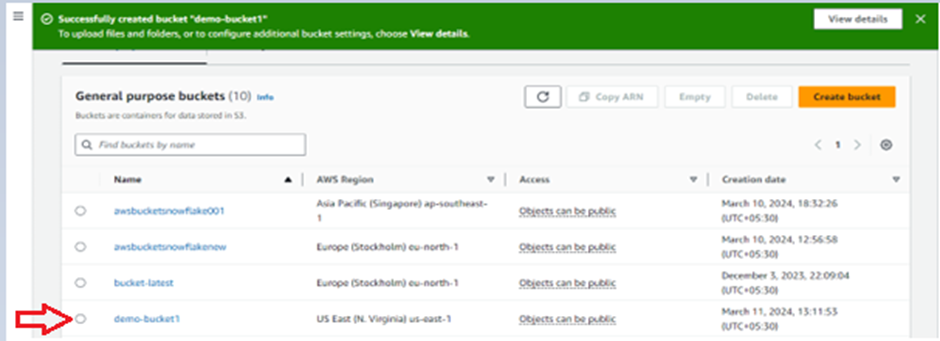
- Select create bucket.
- Once you successfully created the bucket open the bucket you created.
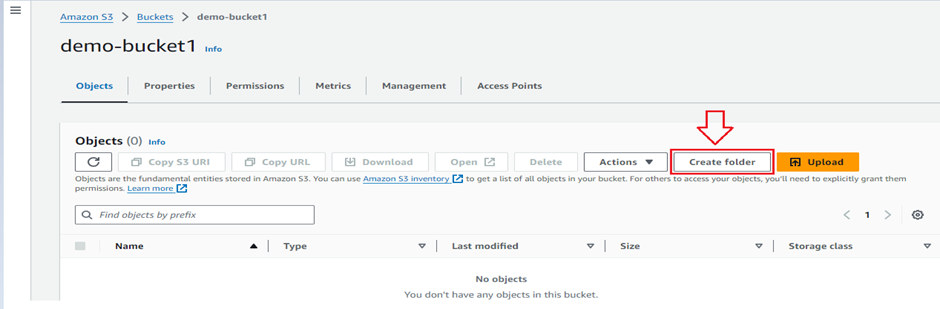
- Create the folder inside the bucket using Create folder option.
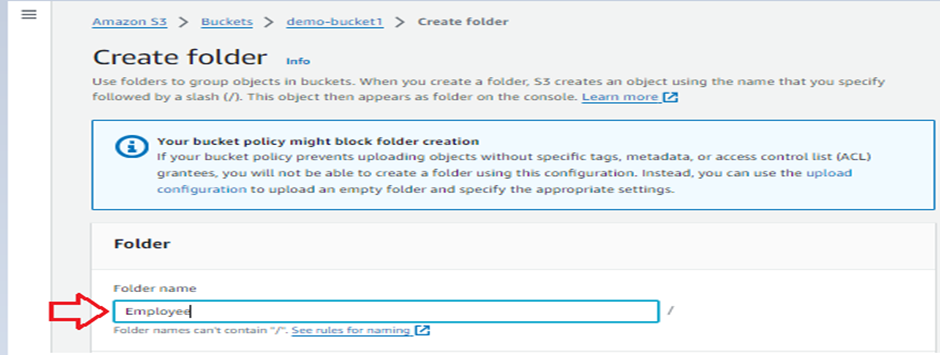
- Give the folder name in folder name box and click Create Folder.
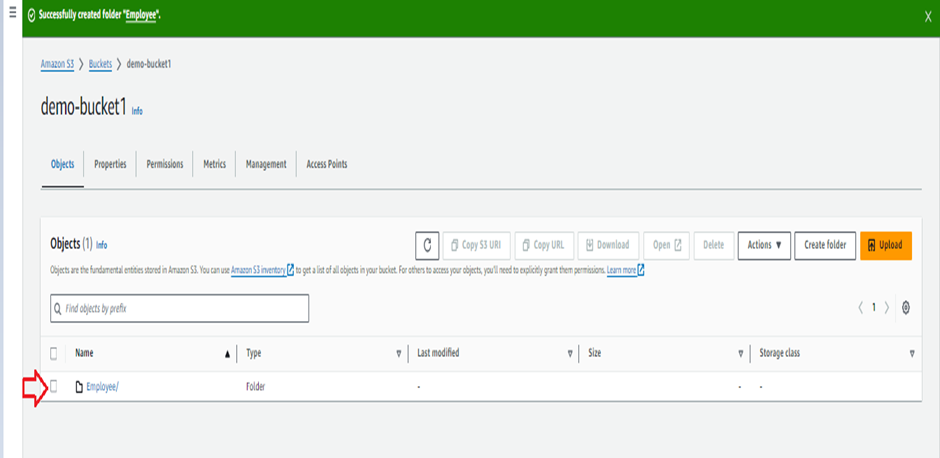
- Once you successfully created the folder open the folder you created.
- Click the upload option to upload the file.

- Click Add files and upload the file from local system and check the uploaded file and click Upload.

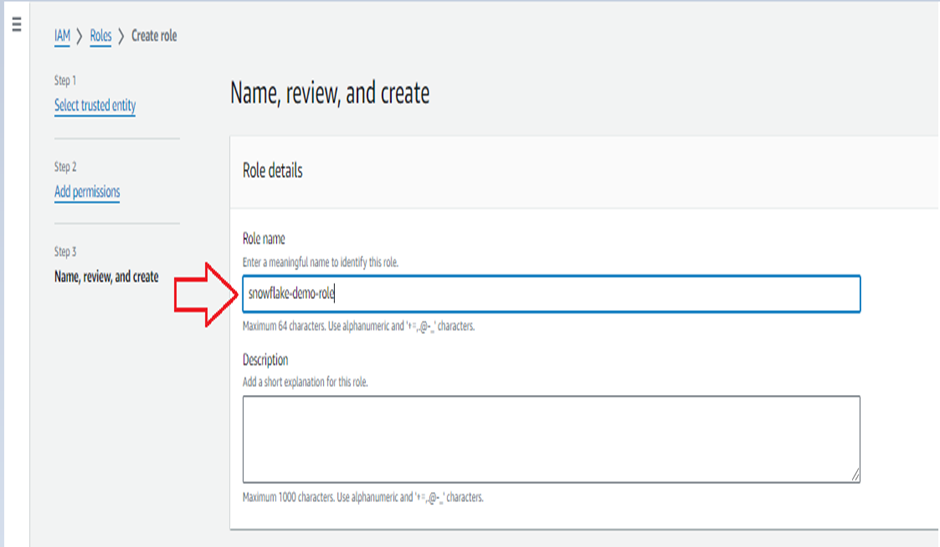
Create role in AWS:
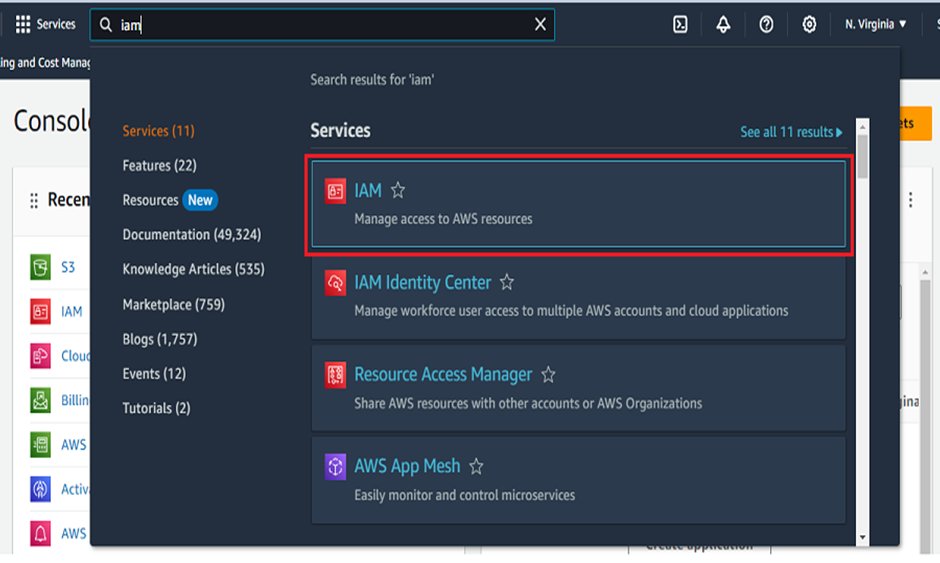
- In the search bar Go to IAM.
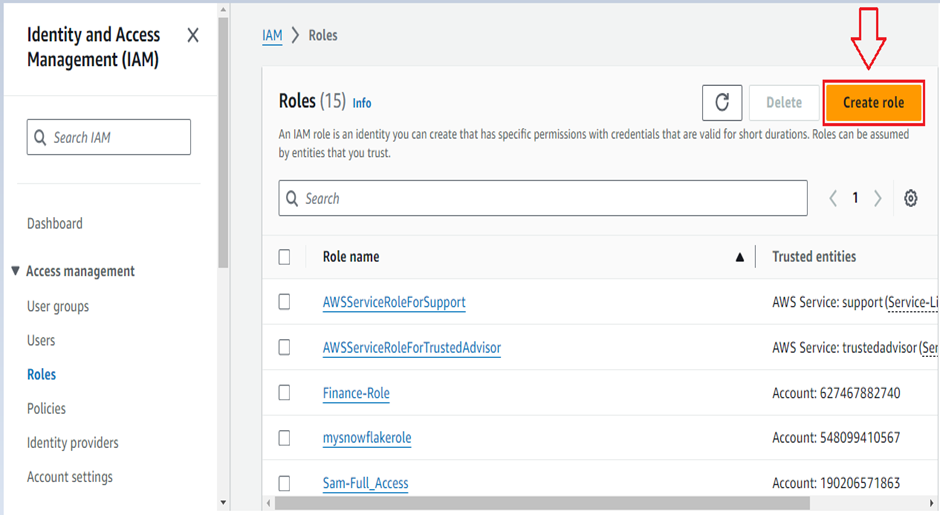
- In the left navigation pane click on Roles.

- Click the Create role option.
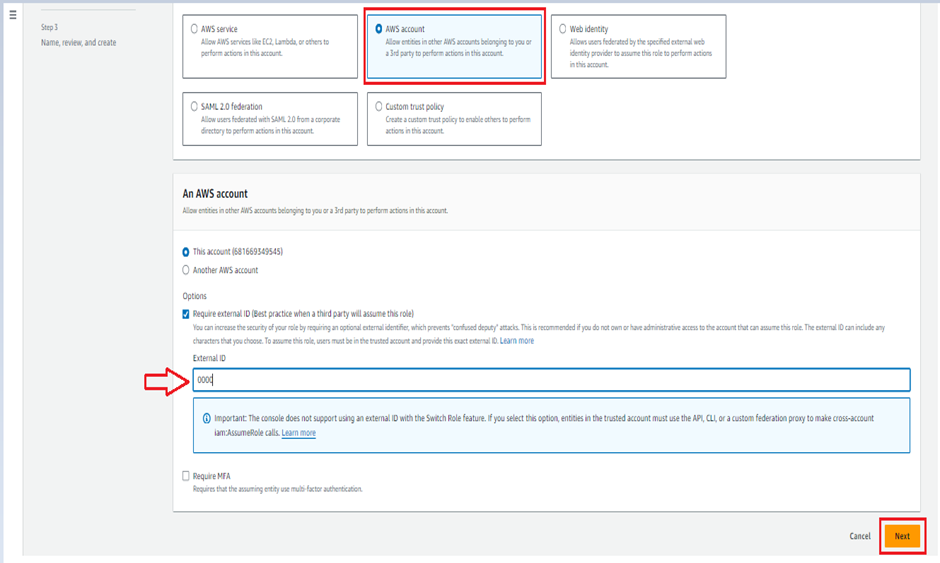
- Check the AWS account option then enable the Require external ID box and give “0000” as external ID and click Next.
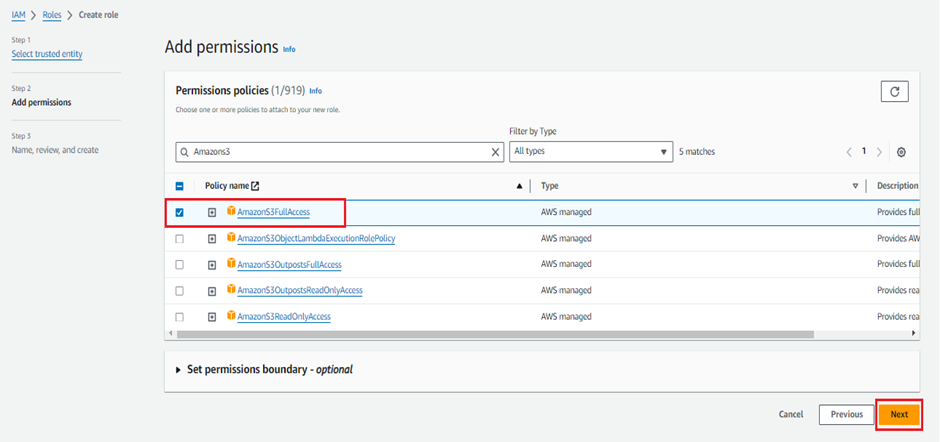
- Search AmasonS3FullAccess permission policies then select the permission and click next.
- Mention the role name in Role name box and click Create Role.
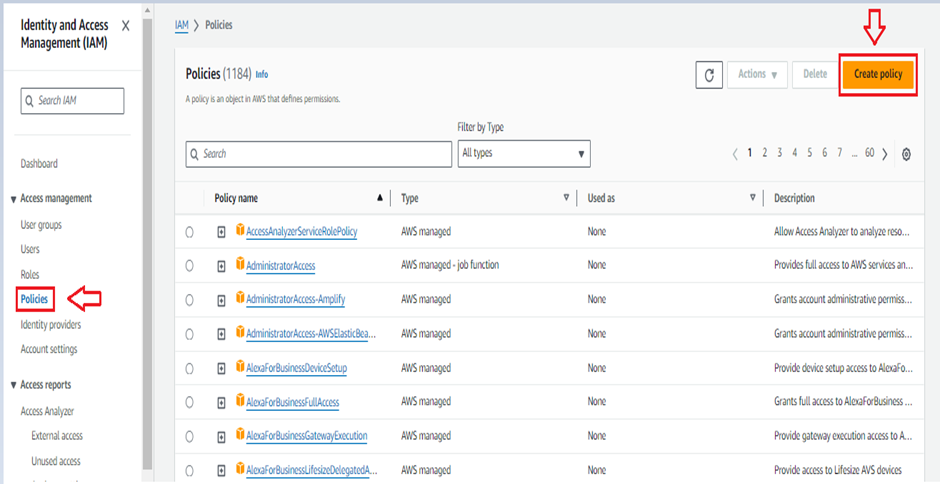
Create Policies in AWS:
- In the search bar Go to IAM.
- In the left navigation pane click on Policies and Create Policy.
- Click JSON file format tab.
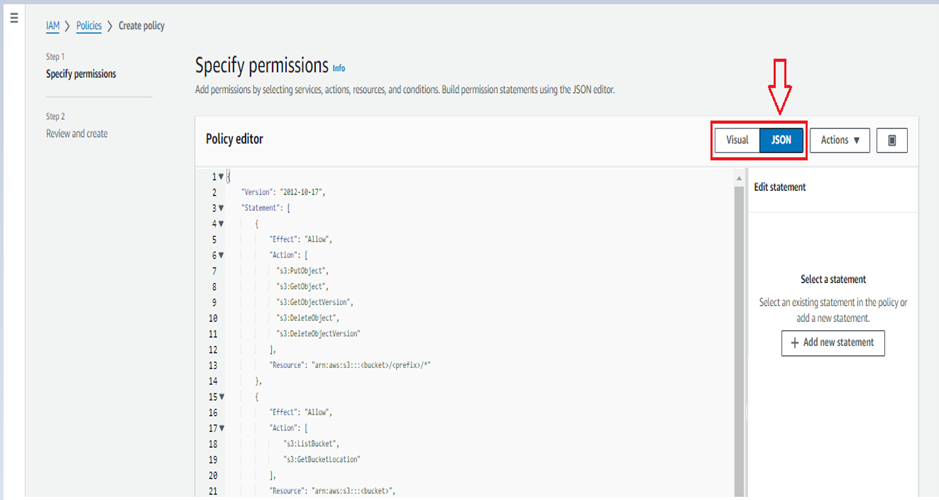
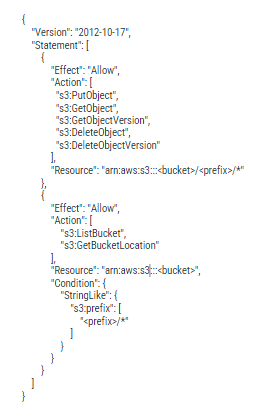
- Paste the below code in policy editor and click create policy.
- Make sure to replace bucket and prefix with your actual bucket name and folder path prefix.
Create storage integration in SNOWFLAKE and exchanging ARN between two accounts:
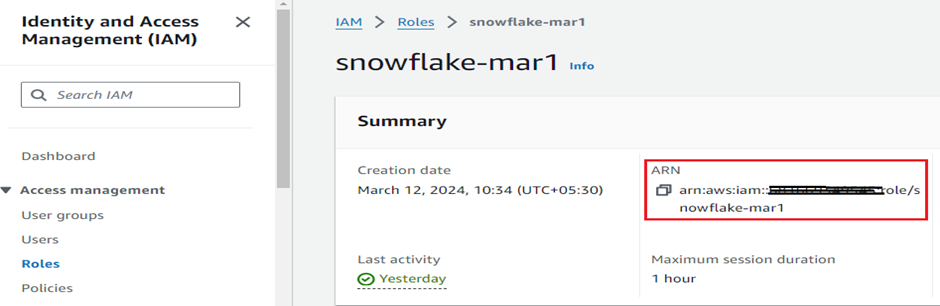
- Copy the ARN credentials from AWS and specify it in the storage integration property (STORAGE_AWS_ROLE_ARN) and mention the bucket path in STORAGE_ALLOWED_LOCATIONS property.
CREATE OR REPLACE
STORAGE INTEGRATION STORAGE_INTEGRATION_DEMO TYPE = EXTERNAL_STAGE
STORAGE_PROVIDER = ‘S3’ ENABLED = TRUE
STORAGE_AWS_ROLE_ARN = ‘arn:aws:iam::*:role/snowflake-mar1’
STORAGE_ALLOWED_LOCATIONS = (‘s3:////’);
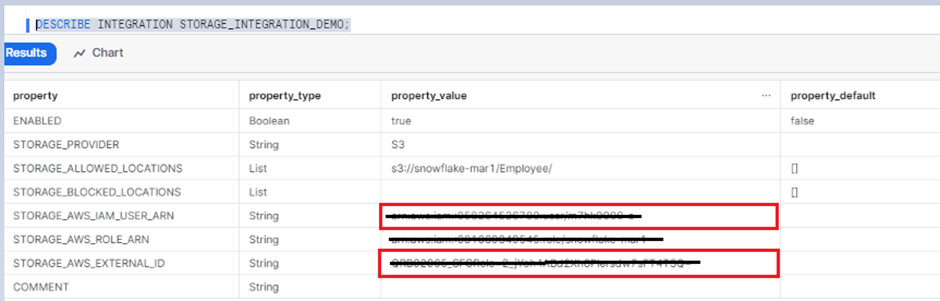
- Run the below comment in snowflake to retrieve the (STORAGE_AWS_IAM_USER_ARN) and (STORAGE_AWS_EXTERNAL_ID ) from STORAGE INTEGRATION for the AWS IAM role.
DESCRIBE INTEGRATION STORAGE_INTEGRATION_DEMO;
Follow the instructions to configure IAM access permissions for the snowflake in your AWS console so that you can use a s3 bucket to access data:
- Login to the AWS console and select IAM services and then select the role that you have created.
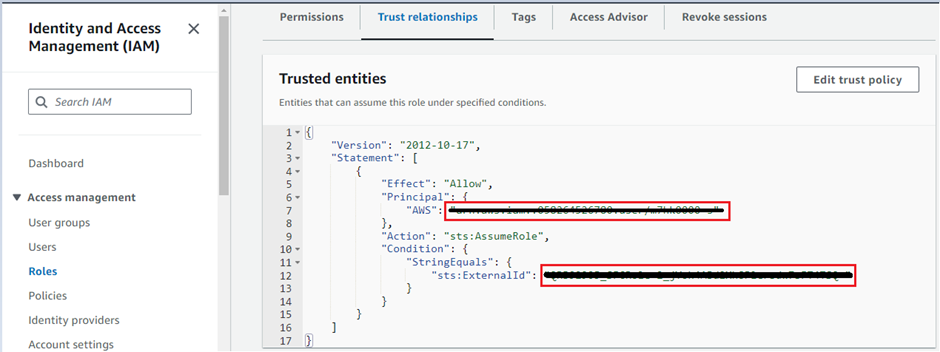
- Select Trust relationship tab and click edit trust policy.
- Modify the policy document with the DESC STORAGE INTEGRATION output values you recorded for STORAGE_AWS_IAM_USER_ARN and STORAGE_AWS_EXTERNAL_ID.
Create external stage and file format in snowflake account:
- TO CREATE DATABASE AND SCHEMA IN SNOWFLAKE.
Data base => CREATE OR REPLACE DATABASE SNOWFLAKE_DB_AWS;
Schema => CREATE OR REPLACE SCHEMA SNOWFLAKE_DB_AWS .STAGE_SCHEMA;
- For creating external stage, specifying the s3 bucket URL and STORAGE INEGRATION name and file format is optional.
CREATE OR REPLACE FILE FORMAT SNOWFLAKE_DB_AWS.PUBLIC.SNOWFLAKE_FILE_FORMAT
TYPE = CSV
SKIP_HEADER = 1
TRIM_SPACE = true
FIELD_OPTIONALLY_ENCLOSED_BY = ‘”‘
REPLACE_INVALID_CHARACTERS = TRUE
NULL_IF = ‘NULL’
DATE_FORMAT=”DD-MM-YYYY”,
TIME_FORMAT=”MM-DD-YYYY HH24:MI”,
TIMESTAMP_FORMAT=”MM-DD-YYYY HH24:MI”;
Creating STAGE in Snowflake:
- Mention the STORAGE_INTEGRATION and FILE_FORMAT details in the respected stage properties.
CREATE OR REPLACE STAGE SNOWFLAKE_DB_AWS.STAGE_SCHEMA.STAGE_TABLE
URL = ‘s3://snowflake-mar1/Employee/’
STORAGE_INTEGRATION = STORAGE_INTEGRATION_DEMO
FILE_FORMAT = SNOWFLAKE_FILE_FORMAT
Create PIPE in snowflake account:
To load the data from stage to table create the pipe through below steps.
- Create the table to load the data from snowflake stage.
- And use the below script to create the pipe and mention the PATTERN.
CREATE OR REPLACE PIPE SNOWFLAKE_DB_AWS.RAW_SCHEMA.RAW_PIPE
AUTO_INGEST = true as
copy into SNOWFLAKE_DB_AWS.RAW_SCHEMA.RAW_TABLE From
SNOWFLAKE_DB_AWS.STAGE_SCHEMA.STAGE_TABLE
PATTERN = ‘.Employees.*.csv’;
Configure event notification in the AWS account:
- Even notification is used to notify the pipe to load the updated file from s3 bucket.
- By running the DESCRIBE PIPE command, you will get the notification channel ARN.

- Navigate to the s3 bucket your file upload folder properties in AWS console.

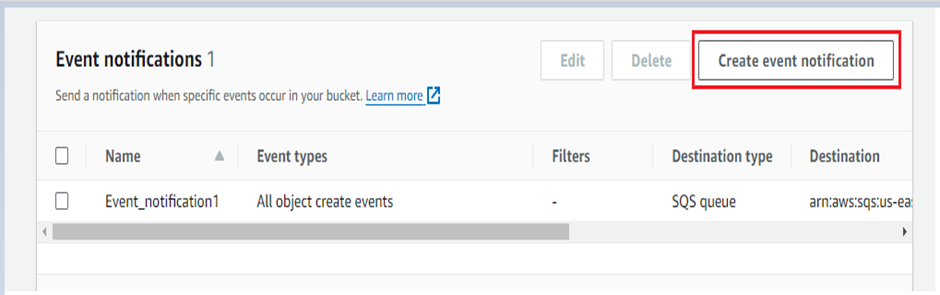
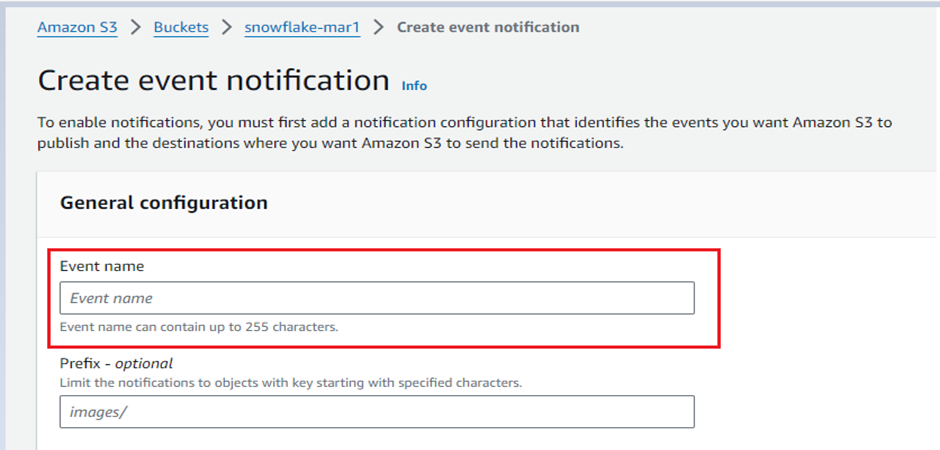
- Scroll down and move to the event notification session and then click create event notification.
- In the general configuration session, specify event name and suffix.
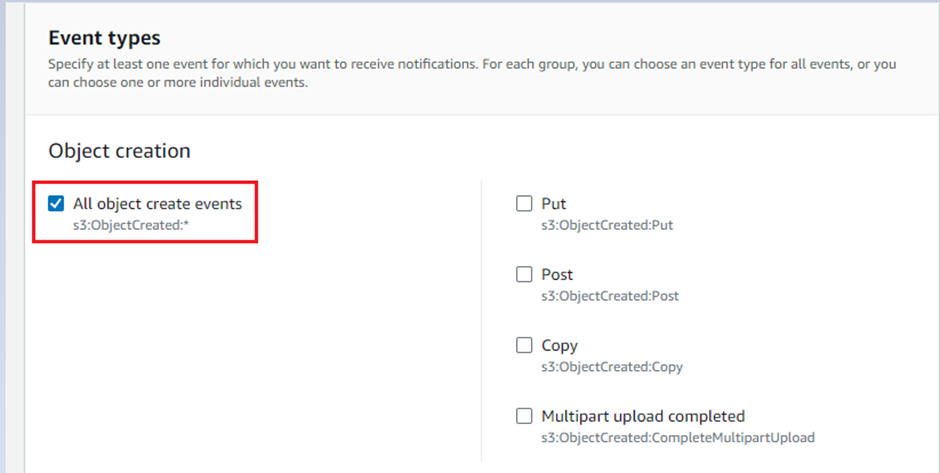
- Under the event type, check the All object create events box.
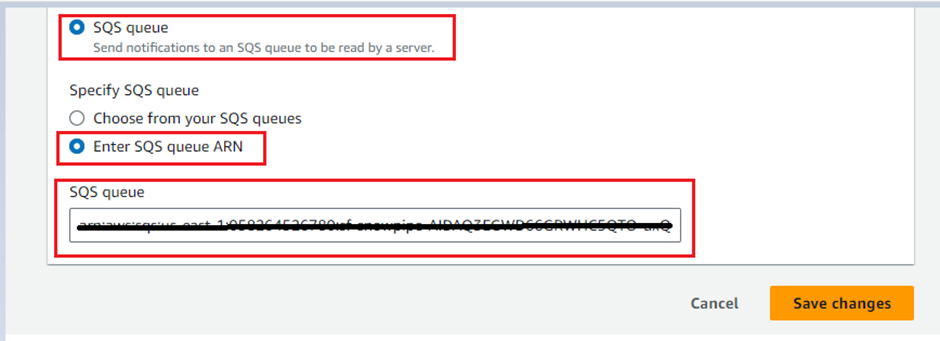
- Under the Destination, select option SQS queue and enter the SQS queue ARN from the snowflake DESCRIBE PIPE pipe name command and click Save Changes.
Conclusion:
This blog helps to ingest data loads automatically from S3 bucket to snowflake destination table using snowpipe integration and amazon event notifications.
Cittabase is a select partner with Snowflake. Please feel free to contact us regarding your Snowflake solution needs. Our snowflake solutions encompass a suite of services for your data integration and migration needs. We are committed to providing personalized assistance and support customized to your requirements.