
- February 14, 2024
- Posted by: Sriramvel M
- Categories: AI/ML, Analytics, Generative AI, Large Language Models, Snowflake, Streamlit
Introduction:
In this blog post, we shall delve into the fundamentals of Retrieval Augmented Generation (RAG) and elucidate the process of constructing a Language Model (LLM) assistant employing Streamlit, Python, OpenAI, and the Llama Index.
What is Retrieval-Augmented Generation ?
In simple terms, Retrieval-augmented generation (RAG) is an AI framework that helps make the answers given by a large language model (LLM) better. It does this by using external sources of information to support what the LLM already knows, making the responses more accurate and helpful. Implementing RAG in an LLM-based question answering system has two main benefits: It ensures that the model has access to the most current, reliable facts, and that users have access to the model’s sources, ensuring that its claims can be checked for accuracy and ultimately trusted.
What is a large language model (LLM)?
A large language model, or LLM, is a deep learning algorithm that can recognize, summarize, translate, predict, and generate text and other content based on knowledge gained from massive datasets.
What is Streamlit?
Streamlit is an open-source app framework in Python language. It helps us create web apps for data science and machine learning in a short time. It is compatible with major Python libraries such as scikit-learn, Keras, PyTorch, SymPy(latex), NumPy, pandas, Matplotlib etc.
Prerequisites:
- A GitHub account is required. If you don’t have one yet, you can easily create a free account.
- You’ll need an API key from your OpenAI account. Initially, this key is provided at no cost, but continued usage may incur charges over time.
A detailed step by step explanation of this process is as follows,
Step 1: Environment Setup:
- The first step is to clone the GitHub repository. This repository contains all the code you will need to successfully complete this process.
- The command to clone the Git is as follows,

- Once we clone the git repository, the folders and files will be available in the local IDE of your choice. Subsequently, we would need to run the following command to install dependencies.

- The 1st command will navigate to the sfguide-blog-ai-assistant folder and the 2nd command will install all the python functions and packages under the requirements.txt file in that location.
- These commands can be executed either in your IDE terminal window or in the command prompt.
Step 2: Data Pipeline creation to download blogs:
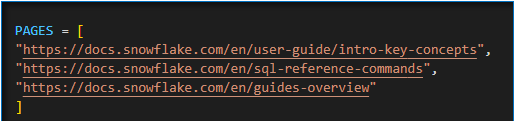
- Alter your PAGES variable with the blog links that you would like to use (In this case we use a few Snowflake help link URL’s).
- After you update the PAGES variable with desired blogs link, switch to the terminal which is in the sfguide-blog-ai-assistant directory and run the following command.
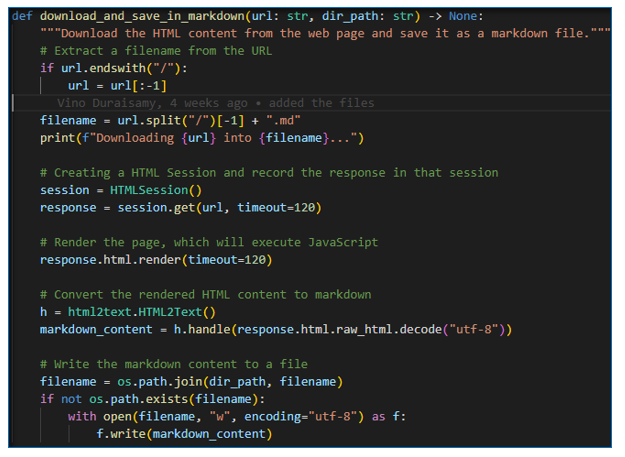
- This will iteratively retrieve all the blogs in PAGES list as HTML files and convert them into markdown files and store them into ‘content’ directory after download. We use the html2text library to convert the html files into markdown files. This would help with the downstream vectorization, which is required for the bot’s answer compilation.
Step 3: Chunk the Blog content and build index:
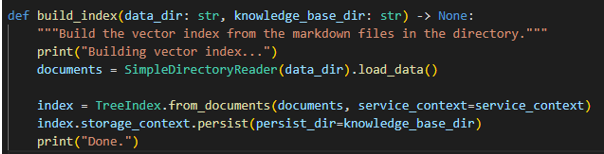
- This step involves building a vector index for the markdown files which we created in the previous steps.
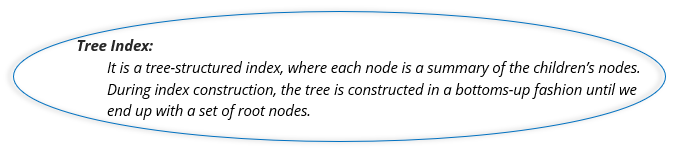
- It creates a chunk of blogs in the content directory and store them as a TreeIndex using Llama Index package.
- Note: The purpose of creating chunks is to overcome context length limitations in models. For instance, if a model has a context length limit of 5,000 tokens, covering about 8 pages, it might struggle with longer documents. To optimize responses, we employ a chunking process, breaking the input document into approximately 500-word segments. An optimal response for the input prompt depends upon how good our model can perform augmentation and retrieve relevant response.
- These chunks are transformed into vector embeddings, stored in a vector store, and indexed for easy retrieval.
- When you pose a question at the user interface, it undergoes conversion into a vector embedding. Subsequently, the vector store (comprising chunks) is scanned to find a similar set of words corresponding to the input prompt. The document pertaining to these set of words is then retrieved for the model’s use. The model, in turn, utilizes the pertinent document chunk to generate a response to the query. This mechanism ensures that the chatbot can effectively answer any questions posed to it.
- However, you may be curious about how the input document is divided into word chunks without compromising the essential context. This is where the llama index proves invaluable. It manages the segmentation of significant words and the indexing of the document. All that’s required is choosing the indexing type based on our specific use case, and Llama Index handles the rest.
Step 4: Storing Markdown files as Vector index:
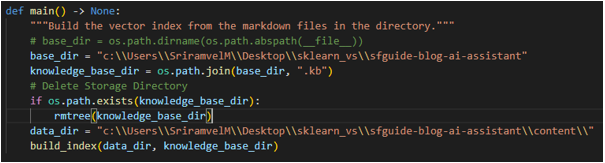
- Open the build_index.py python file from any IDE of your choice and update the YOUR_OPENAI_API_KEY with your OpenAI API key.
- Execute the following command in your terminal,
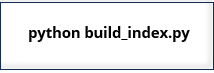
- After successful completion, it will store documents as chunks in ‘. kb’ directory.
Step 5: Streamlit Chatbot APP:
- Next, we need to create a user interface for our chatbot. For that we used streamlit package in python.
- Open the streamlit_app.py python file from IDE of your choice and replace the YOUR_OPENAI_API_KEY with your OpenAI API key.
- You should execute the following command in terminal to trigger our streamlit interface.
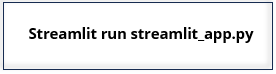
- A webpage hosted on localhost will be opened, allowing you to pose any questions related to the topics covered in your input documentation. The bot will then provide responses to your queries.
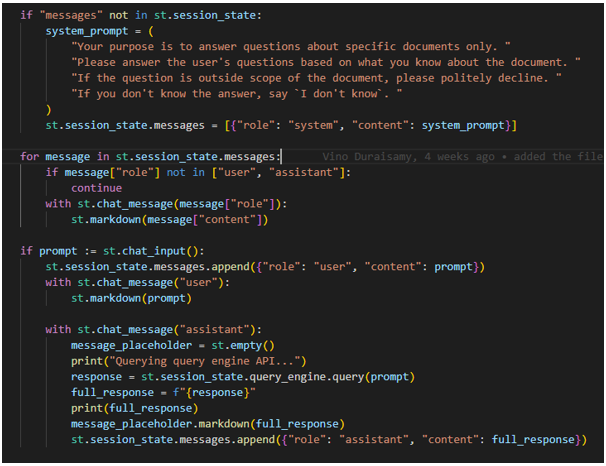
- In Within the Python file streamlit_app.py, a dictionary named “messages” is established within the streamlit session_state element, providing a means to share variables among reruns for each user session. This dictionary includes two keys: “role” and “content.”.
- Two roles, namely user and assistant, are assigned to the “role” key. The “content” key encompasses the prompt used to initiate the chat history, and the user’s input prompt constitutes its content.
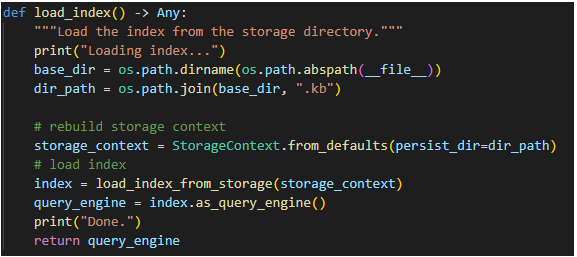
- When the user gives input prompt, it will refer to load_index () function and retrieve the relevant chunk of document from the ‘. kb’ file.
- By using OpenAI’s chat completion mechanism with the input prompt and the relevant chunk retrieved by llama index, the response for the user input prompt is generated by the chatbot.
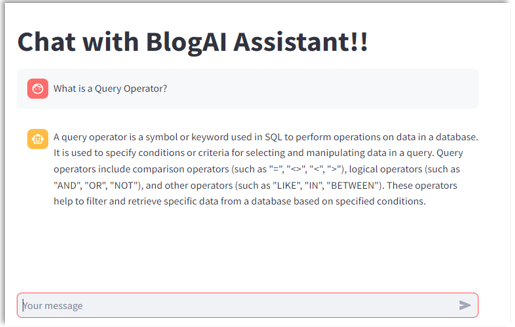
Step 6: Streamlit Interface:
- Here is the output response from the streamlit interface when a question is asked to the Chatbot.
Conclusion:
By following the above steps, we could adeptly construct a chatbot model leveraging Streamlit, designed to respond comprehensively to inquiries derived from the input blogs / pages. The multifaceted capabilities of such a model extend across a diverse spectrum of domains, thereby rendering it applicable and valuable in a myriad of contexts and applications where answering capabilities are desired.
Please feel free to reach out to us to discuss how we can address your needs in the AI/ML space. We offer customized solutions designed to effectively meet your specific requirements.