
- February 29, 2024
- Posted by: Priya S
- Category: APEX
Pin and Unpin Charts in Oracle APEX Dashboard
Introduction:
Oracle APEX (Application Express) provides a robust platform for creating web applications with ease. One common requirement in dashboard applications is the ability to pin and unpin charts for a more personalized user experience. In this blog post, we’ll guide you through the process of implementing a feature that allows users to pin and unpin charts, displaying them on the home page of your Oracle APEX application.
Prerequisites:
Before diving into the implementation, make sure you have the following:
- Access to an Oracle APEX workspace.
- A dashboard page with charts that you want to pin/unpin.
- Basic knowledge of Oracle APEX application development.
Step 1: Create a Pinning Table
Create a table in your APEX workspace to store information about the pinned charts. This table can have columns like “Chart_ID,” “Chart_Type,” “User_ID,” and “Pinned_Flag,” where “Pinned_flag” is set to ‘Y’ indicates whether the chart is pinned or not.
Example:
CREATE TABLE “TB_PINNED_CHART “
( “CHART_ID” NUMBER(10,0) NOT NULL ENABLE,
“CHART_TYPE” VARCHAR2(250) NOT NULL ENABLE,
“USER_ID” NUMBER(10,0) NOT NULL ENABLE,
“PINNED_FLAG” CHAR(1) NOT NULL ENABLE,
“CREATED_DATE” DATE NOT NULL ENABLE,
“CREATED_BY” NUMBER(10,0) NOT NULL ENABLE,
“LAST_UPDATED_DATE” DATE,
“LAST_UPDATED_BY” NUMBER(10,0),
CONSTRAINT “PK_TB_PINNED_CHART ” PRIMARY KEY (“CHART_ID”)
USING INDEX ENABLE );
Step 2: Modify Chart Region SQL Query
Adjust the SQL query of your chart region to include a join with the pinning table. This join should filter the results based on the current user and the “Pinned” flag.
SELECT chart_data FROM your_data_table d
LEFT JOIN tb_pinned_chart p ON d.chart_id = p.chart_id
WHERE p.user_id =: APP_USER
AND p.pinned_flag = ‘Y’;
Step 3: Add Pin/Unpin Button
On your dashboard page, add a button to each chart region for pinning and unpinning charts.
Example: –
for i in (SELECT * FROM TB_PINNED_CHART) loop
IF (i.pinned_flag = ‘Y’) THEN
htp.p(apex_string.format(‘</button><div class=”my-button-pin-js content bi-pin-fill green-color” data-
chart_id=”%0″><p>%1</p></div>’,i.chart_id,i.chart_type));
else
htp.p(apex_string.format(‘</button><div class=”my-button-unpin-js content bi-pin-angle-fill red-color”
data-chart_id=”%0″><p>%1</p></div>’,i.chart_id,i.chart_type));
end loop;
Step 4: Create a (hidden) page item to hold the identifier of the row you clicked.
Example: – P10_CHART_ID.
Step 5: Create Dynamic Action to toggle the “Pinned” status button for the respective chart.
Implement a dynamic action on the pin/unpin button click to update the pinning table and refresh the chart region. Use the APEX APIs or PL/SQL processes to handle the database update.
Pinning Chart
1. Create a Dynamic action mypinbuttonclicked to Inserts record of the selected chart in pinned_chart table and then refresh region or submit page to show the pinned button.
- Event: Custom
- Custom Event: mypinbuttonclicked
- Selection Type: “Javascript Expression”
- Javascript Expression: document
True Action: Insert record in tb_pinned_chat table.
- Action: Execute Server-side Code
- Language: PL/SQL
- Code:
DECLARE
V_USER_ID NUMBER;
V_CHART_TYPE VARCHAR2(250);
BEGIN
SELECT ID INTO V_USER_ID FROM AUTH_USER WHERE UPPER(USERNAME) = UPPER(:APP_USER);
SELECT CHART_TYPE INTO V_CHART_TYPE FROM YOUR_DATA_TABLE WHERE ID = :P10_CHART_ID;
INSERT INTO TB_PINNED_CHART (chart_id, chart_type, user_id, pinned_flag,created_by,created_date)
VALUES (TB_PINNED_CHART_SEQ.nextval,V_CHART_TYPE,V_USER_ID,’Y’, V_USER_ID, SYSDATE);
END;
- Items to Submit: P10_CHART_ID
2. Create a click event dynamic action on my-button-unpin-js to set the selected chart_id to P10_CHART_ID and call the custom event mypinbuttonclicked mentioned in step 1 to insert the pinned chart details into the table.
- Selection Type: JQuery Selector
- JQuery Selector: .my-button-unpin-js
True Action : Set P10_CHART_ID
- Action: “Set Value”
- Set Type: “Javascript Expression”
- Javascript Expression: this.triggeringElement.dataset[‘chart_id’]
- Affected Element: P10_CHART_ID
True Action : Call Dynamic Action mypinbuttonclicked
- Action: “Execute Javascript Code”, Code: $.event.trigger(“mypinbuttonclicked”);
UnPinning Chart
1. Create a Dynamic action myunpinbuttonclicked to delete the record of the selected chart in pinned_chart table and then refresh the region or submit page to show the unpinned button.
- Event: Custom
- Custom Event: myunpinbuttonclicked
- Selection Type: “Javascript Expression”
- Javascript Expression: document
True Action: Delete record in tb_pinned_chat table.
- Action: Execute Server-side Code
- Language: PL/SQL
- Code: DELETE FROM TB_PINNED_CHART WHERE chart_id = :P10_CHART_ID ;
- Items to Submit: P10_CHART_ID
2. Create a click event dynamic action on my-button-pin-js to set the selected chart_id to P10_CHART_ID and call the custom event myunpinbuttonclicked mentioned in step 1 to delete the unpinned chart details into the table.
- Selection Type: JQuery Selector
- JQuery Selector: .my-button-pin-js
True Action : Set P10_CHART_ID
- Action: “Set Value”
- Set Type: “Javascript Expression”
- Javascript Expression: this.triggeringElement.dataset[‘chart_id’]
- Affected Element: P10_CHART_ID
True Action : Call Dynamic Action myunpinbuttonclicked
- Action: “Execute Javascript Code”, Code: $.event.trigger(“myunpinbuttonclicked”);
Step 6: Display Pinned Charts on Home Page
Create a new home page and customize it to display the pinned charts. Join the chart query with tb_pinned_table table for the home page region. Include the “Pinned_flag” value to ‘Y’ to ensure only pinned charts are displayed.
Example:
SELECT chart_data FROM your_data_table d
JOIN tb_pinned_chart p ON d.chart_id = p.chart_id
WHERE p.user_id =: APP_USER
AND p.pinned_flag = ‘Y’;
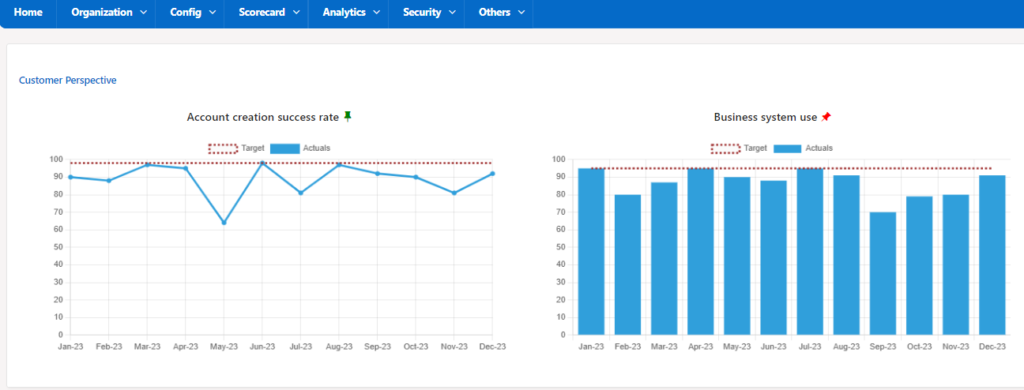
The pinned charts will be displayed in the Home Page as shown below:
Conclusion:
By following these steps, you can enhance the user experience of your Oracle APEX dashboard by allowing users to pin and unpin charts. This personalized approach empowers users to tailor the dashboard to their preferences, improving overall usability and satisfaction.