
- November 22, 2023
- Posted by: Swetha & Yuvasri
- Categories: Infrastructure as a Service, Snowflake
Introduction
Organizations largely depend on automated data pipelines to handle, transform, and analyse enormous volumes of data in today’s data driven world. Data engineers and analysts can create effective and scalable data pipelines that ensure fast and accurate data delivery for business insights by combining the strengths of DBT and Airflow.
AIRFLOW:
Data pipelines can be created and managed using Apache Airflow, an open-source workflow management tool. Workflows composed of directed acyclic graphs (DAGs) of jobs are used by Airflow.
DBT:
Utilizing cloud data platforms such as Snowflake, DBT is a contemporary data engineering framework that is rapidly gaining traction in modern data architectures.
SNOWFLAKE:
Snowflake is a cloud data platform that offers a single, integrated solution for a data interchange, data lake, and warehouse. Snowflake offers high performance, security, querying structured and semi-structured data at any scale.
Steps to Follow:
This documentation provides a step-by-step guide for orchestrating Snowflake, a cloud-based data warehousing platform, and AWS Airflow, a powerful orchestration and workflow automation tool, using DBT (Data Build Tool). This setup allows you to create and manage ETL processes that transform and load data into Snowflake.
Prerequisites:
– Access to a Snowflake account.
– AWS Airflow environment set up.
– Knowledge of SQL and Python.
– Basic understanding of ETL concepts.
- Setting up Snowflake:
1.1. Snowflake Account Setup:
– Create a Snowflake account if you don’t have one.
– Note your Snowflake account URL, username, and password.
1.2. Snowflake Database and Warehouse:
– Create a Snowflake database for your data.
– Set up a Snowflake warehouse for processing data.
1.3. Snowflake User and Permissions:
– Create a Snowflake user with the necessary privileges.
– Grant the user access to the database and warehouse.
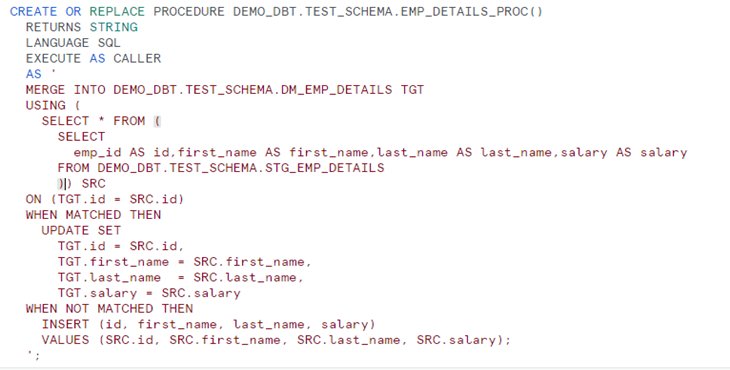
1.4. Create a Snowflake Procedure:
– In Snowflake, create a procedure that you want to schedule. Ensure it is set up and tested.
- Integrating DBT with Snowflake:
2.1. Installing DBT:
– Using this link https://www.getdbt.com/signup/
2.2. Configuring DBT Profiles:
– Create a DBT profile to specify Snowflake connection details.
– Configure profiles for development, testing, and production environments.
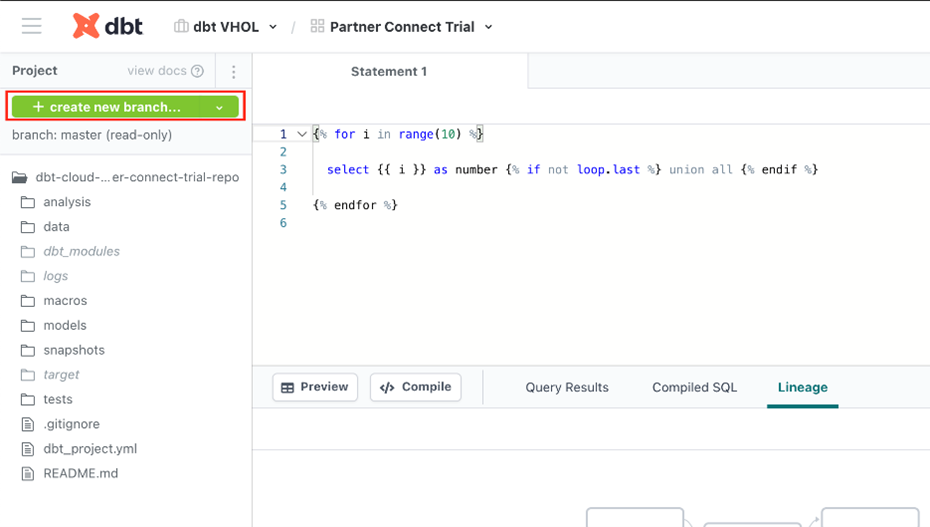
2.3. DBT Project Configuration:
Click create new branch to check out a new branch to start developing.
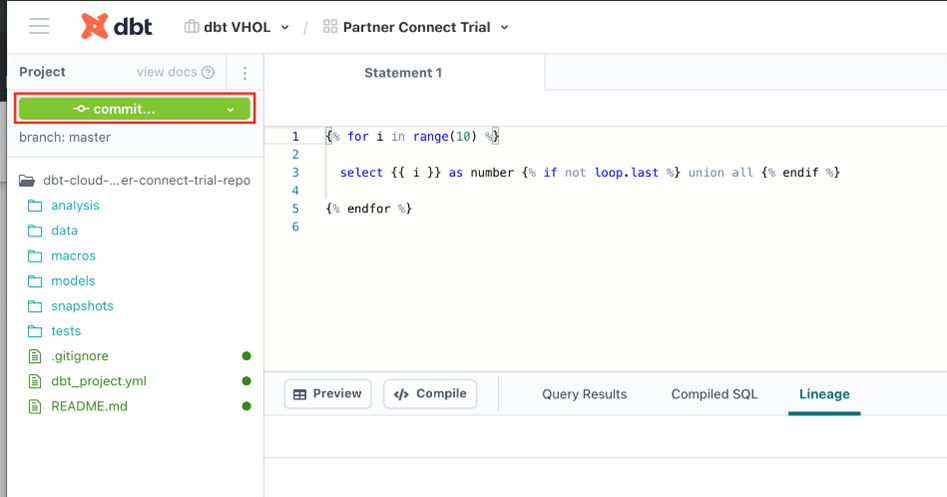
- Under Version Control on the left, click Commit and sync and add a message. For example, “Add customers model, tests, docs.”
- Click Merge this branch to main to add these changes to the main branch on your repo.
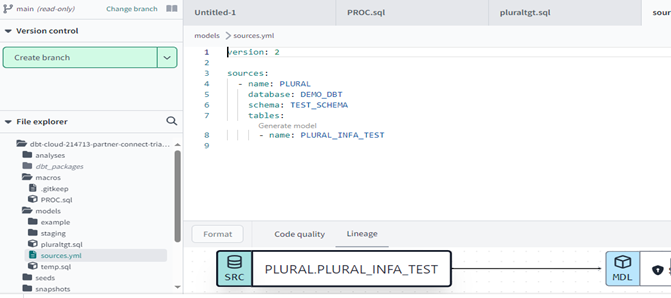
2.4. Creating DBT Models:
– Define DBT models to transform data.
- Create a new YML file models/sources.yml to get Source Table & Views.
- Declare the sources by creating the following into the file and clicking Save.
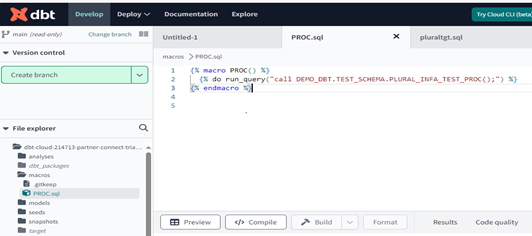
Creating Macros
In macros folder create a SQL file to call procedure in snowflake and push it Main Branch.
Now that you’ve built your customer model, you need to commit the changes you made to the project so that the repository has your latest code.
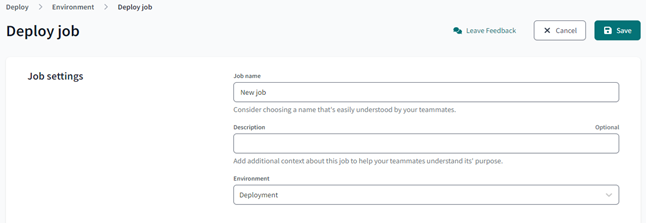
Create a deployment environment
- In the upper left, select Deploy, then click Environments.
- Click Create Environment.
- In the Name field, write the name of your deployment environment. For example, “Production.”
- In the DBT Version field, select the latest version from the dropdown.
- Under Deployment Credentials, enter the name of the dataset you want to use as the target, such as “Analytics”. This will allow DBT to build and work with that dataset. For some data warehouses, the target dataset may be referred to as a “schema”.
- Fill the required & Click Save.
3.Orchestrating DBT and AWS Airflow:
3.1. Establishing a Connection between DBT & AWS (Airflow):
– Get service token from DBT, In Account Settings >> Service Tokens.
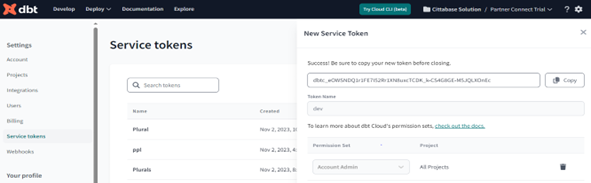
– Login into AWS account & create a connection, Open Airflow UI >> Admin >> Connections.
– Fill the required details, Get Account ID from DBT URL and give service tokens as API Token.
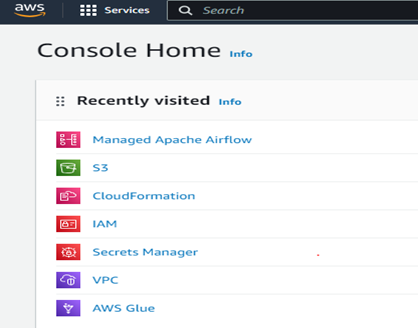
Setting up AWS Airflow:
3.2. AWS Airflow Environment Setup:
– Set up an AWS Airflow environment using Amazon Managed Workflows for Apache Airflow (MWAA) or self-hosted Airflow on AWS.
– Use this link https://321774799243.signin.aws.amazon.com/console
– Sign in with credentials.
3.3. AWS Airflow DAG Configuration:
– Define and configure your Airflow DAGs, specifying tasks for data extraction, transformation, and loading.
– Use Airflow Operators for Snowflake and DBT tasks.
– Define dependencies between tasks in your DAGs.

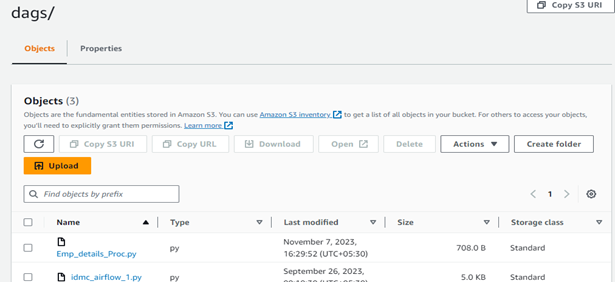
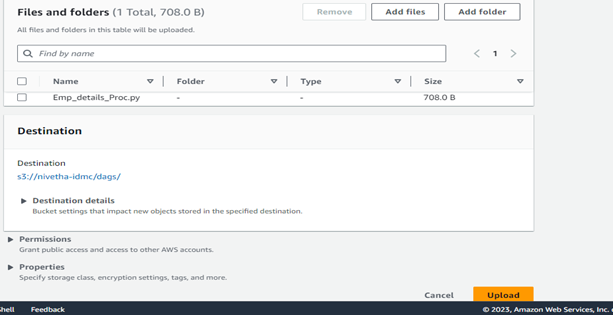
Setting up S3 Buckets:
- Goto S3 > Create Bucket > Create Folder in Bucket named as dags/
- Place the dag python file in the created folder ‘dags/’
3.4. Creating Airflow DAGs:
– Create Airflow DAGs that incorporate DBT and Snowflake tasks.
– Define task dependencies and schedule them according to your ETL workflow.
Sample Dag python code
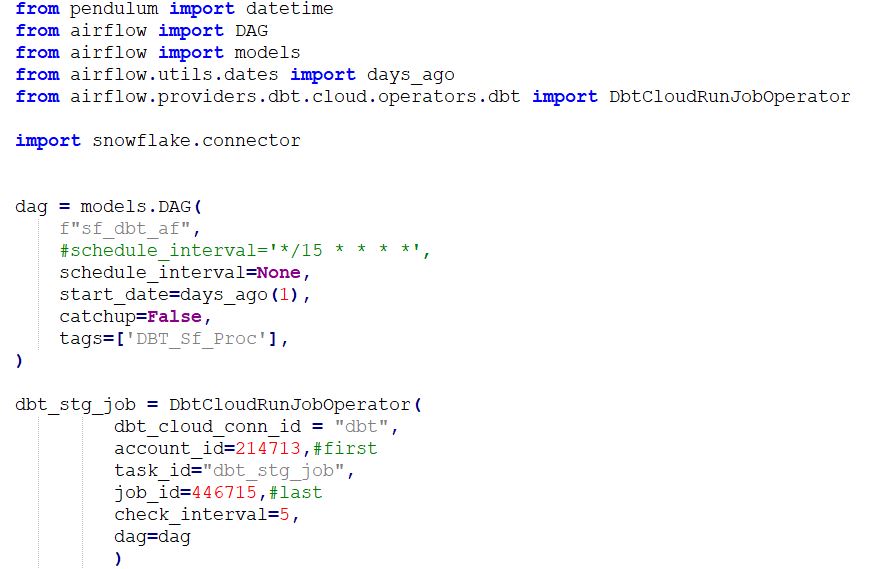
Note
- dbt_cloud_conn_id should be the created id from Admin > Connections.
- Account ID & Job ID as in the DBT URL.
3.5. Scheduling DAGs:
– Use Airflow’s scheduling capabilities to automate your ETL workflows.
– Set up triggers and scheduling intervals for your DAGs.
3.6. Monitoring and Logging:
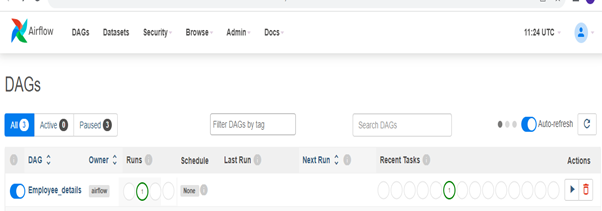
– Monitor the execution of your Airflow DAGs using the Airflow web interface.
– Utilize Airflow’s logging and alerting capabilities for error handling and notifications.
Scheduling the Job
- Use the Airflow web UI to trigger the DAG and confirm that it runs successfully.
- Schedule the DAG to run at your desired intervals using the Airflow Scheduler.
- Monitor the Airflow web UI for DAG execution status and logs.
Conclusion:
– With Snowflake, AWS Airflow, and DBT, you can orchestrate and automate your ETL processes efficiently.
– This setup allows you to maintain data quality, manage data transformations, and ensure timely data delivery to your analytics and reporting tools.
Cittabase Specializes in modernized data platform implementations and a Snowflake SELECT Partner. Feel free to reach out for any of your Snowflake implementations.