
- February 28, 2024
- Posted by: Geetha S
- Category: Airbyte
Introduction:
Airbyte, one of the leading open- source platforms facilitating data integration and ELT processes, is designed to simplify the process of moving and managing data across various sources. With its user-friendly interface and extensibility, Airbyte enables seamless data integration, making it an ideal choice for businesses seeking efficiency and flexibility in handling diverse datasets.
Apache Airflow is a platform to programmatically write, schedule, and monitor workflows. It allows one to build automated data integration pipelines and monitor their progress.
This blog helps to orchestrate jobs in Airbyte cloud with Airflow using Airbyte API.
Step 1: Get an authentication token for connecting to Airbyte Cloud.
- API token is required to enable interaction between Airflow and Airbyte Cloud. Generate JSON Web Token (JWT) in the portal – Airbyte Developer Portal. Click “New Api Key” to create a new key.
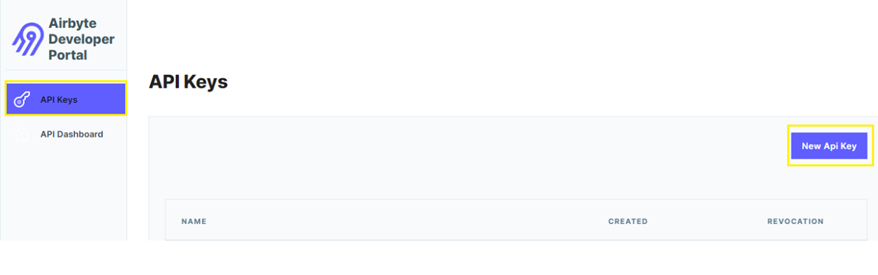
- Give preferred name for the key & generate it.
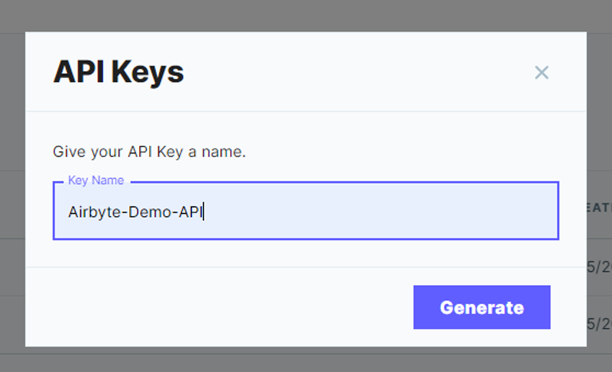
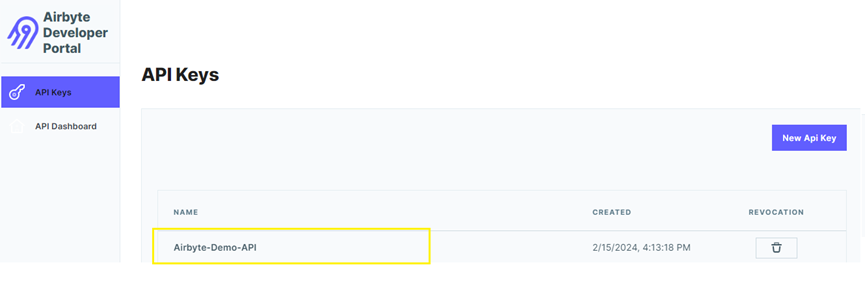
- The below highlighted one is the newly created API Key.
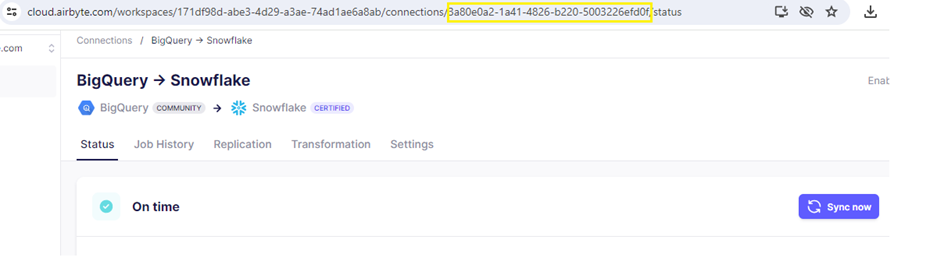
Step 2: Get the ID of the connection that you wish to orchestrate.
Get the connection identifier which can be extracted from the URL in Airbyte Cloud as shown below:
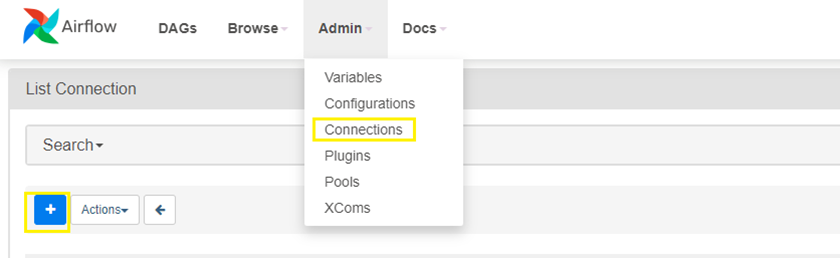
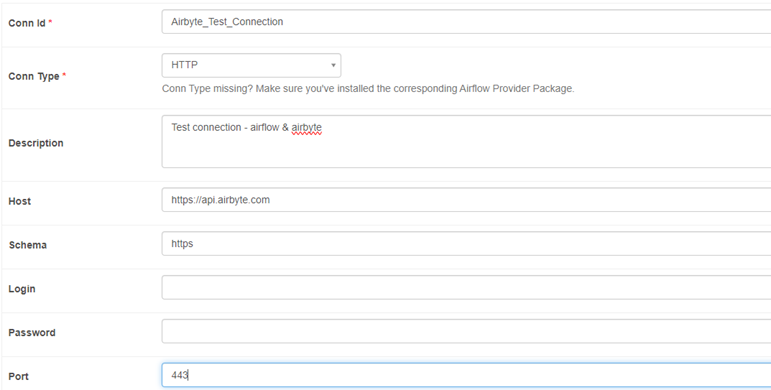
Step 3: Create Airflow connection to connect Airbyte Cloud.
- The Airflow connection will be used by the SimpleHttpOperator to send HTTP requests to the Airbyte API. Create a new connection in the Airflow UI by selecting Admin -> Connections, and then click on the “+” button to add a new connection.
- Enter Preferred connection Id and other details for the connection as shown below.
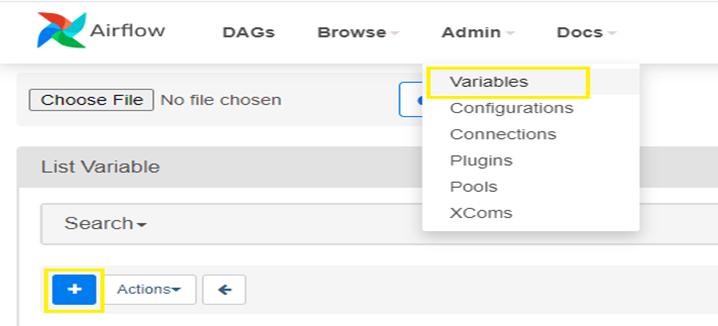
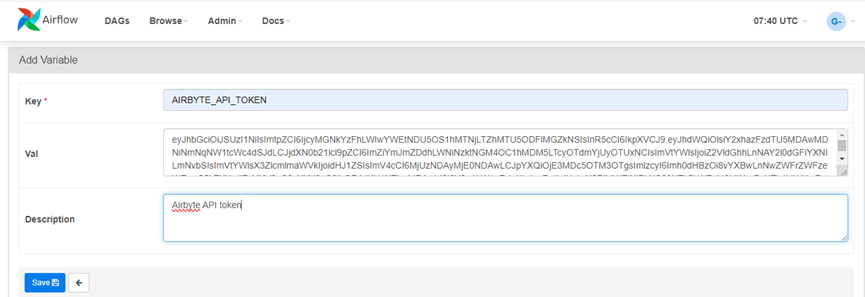
Step 4: Define a variable to store API key value (JSON Web Token).
- Define a variable to store API key value that was generated as part of Step 1. In Airflow, go to Admin -> Variables and click on the “+” symbol to add a new variable.
- Assign Airbyte API token value to the new variable – AIRBYTE_API_TOKEN.
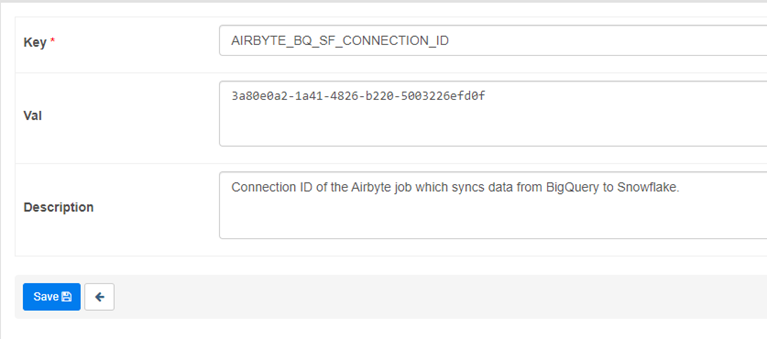
Step 5: Define a variable to store connection ID.
Create a new variable and assign the connection identifier extracted from the job’s URL in Airbyte Cloud (done as part of Step 2). Variable AIRBYTE_BQ_SF_CONNECTION_ID is now created.
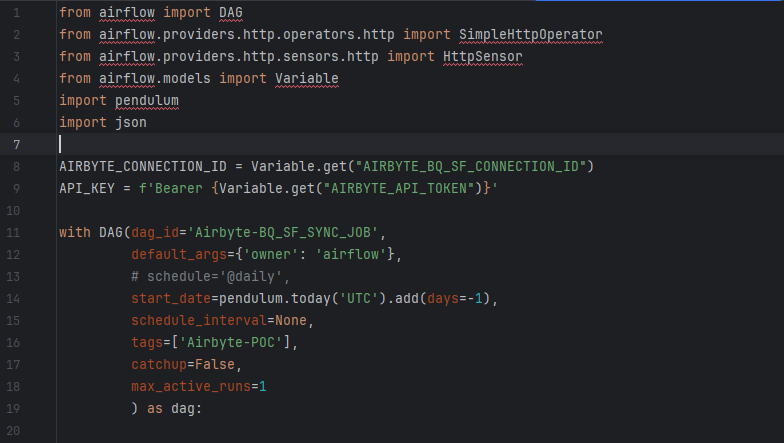
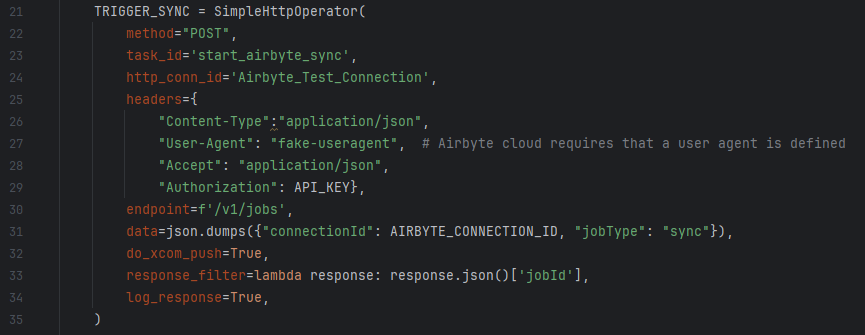
Step 6: Create a DAG to trigger the Airbyte Job
Create a DAG to trigger the Airbyte job and checks the status of the sync job. Below is the snippet of the python code.
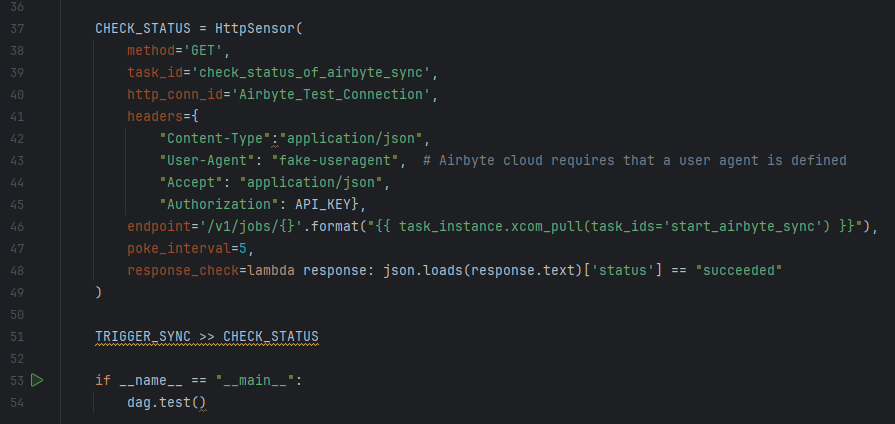
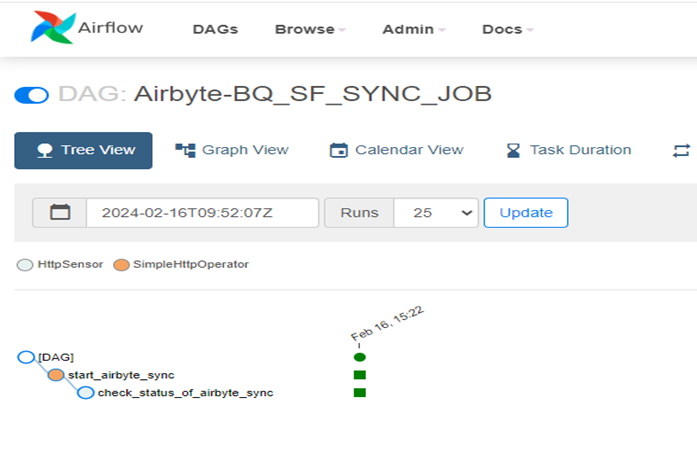
Step 7: Check the status of the jobs.
Trigger the DAG and verify the status of the jobs in Airflow and in Airbyte. The sync job is now completed successfully. Airbyte job is now orchestrated successfully in Airflow.
Airflow – DAG Status:
Airbyte Job Status:

Conclusion:
By making use of Airflow’s robust scheduling and monitoring features, Orchestrating Airbyte Cloud jobs with Airflow helps to create automated data pipelines and helps to set dependency between jobs effectively.
Cittabase excels in modern data platform deployments and is a proud Airbyte partner . Feel free to reach out for your data integration needs using Airbyte.