
- September 12, 2022
- Posted by: Maladevi D
- Category: PowerExchange
Abstract:
This blog explains the concept of PWX, MSQL CDC 10.4.1 (latest, at the time of writing this blog) and discusses about the benefits and Challenges of PWX with CDC.
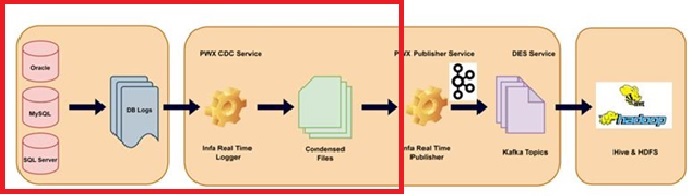
High level Architecture on Informatica with Microsoft sql PWXCDC:
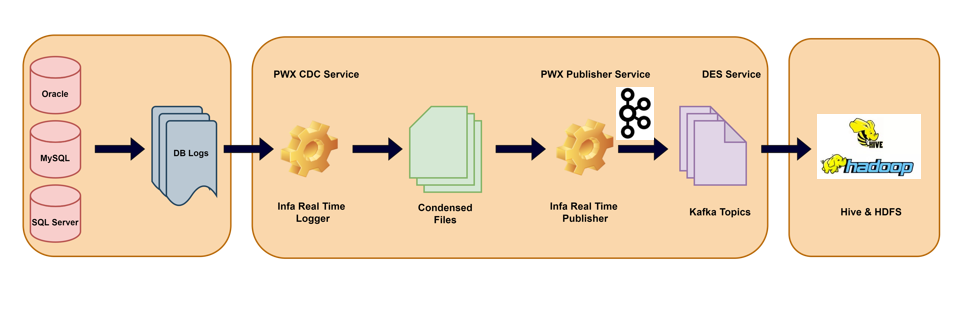 Architecture for Microsoft SQL PWXCDC:
**The Explanation for the CDC Publisher is given in separate blog.
Overview on PWX with Change Data Capture:
PWX uses SQL Server transactional replication to capture change data from tables in SQL Server databases. For CDC to work, you must enable SQL Server Replication on the SQL Server instance from which change data is to be captured. If your database has a high volume of change activity, you should use a distributed server as the host of the distribution database.
PWX Listener:
The PWX Listener manages to capture registrations and extraction maps for all CDC data sources. The PWX Listener uses the Data Direct ODBC driver that PWX supplies to connect to the SQL Server system.
PWX Logger:
PWX Logger can be used to capture the change data and write it to distribution log files by configuring the PWX Logger. The change data is then extracted from the PWX Logger log files.
PWX Express CDC for Microsoft SQL:
PWX Express requires some configuration changes to DBMOVER.CFG and PWXCCL.CFG.
dbmover.cfg :
/***************************************************************
/* PWX Configuration File
/***************************************************************
/* CONFIG: PWXCCL with SQL Server source
/***************************************************************
/* NOTE: Do Not Increase the lengths,
/* MSQLEEEE, pwxccl_eeee, and xxxxEEEE strings.
/***************************************************************
/* REPLACE THESE STRINGS:
/* EEEE the name of the PWX Listener
/* (will also use this for Listener commands)
/* MSQLEEEE the “Instance” name from PWX Navigator!
/* pwxccl_eeee the name of the PWX Logger
/* (will also use this for Logger commands)
/* 10.00.00.00 the name of the Distribution Server
/* PWX_HOME the actual directory path for PWX install
/* CAPT_PATH_DIR the path where you want the CCT, CDCT, CDEP
/* CAPT_XTRA_DIR the path where you want extraction maps
/***************************************************************
/* YOU CAN CHOOSE TO REPLACE THESE STRINGS:
/* MSQLEEEE the name of the MSQL CAPI_CONNECTION
/* CAPXEEEE the name of the CAPX CAPI_CONNECTION
/***************************************************************
LISTENER=(EEEE,TCPIP,2480)
NODE=(local,TCPIP,127.0.0.1,2480)
NODE=(EEEE,TCPIP,127.0.0.1,2480)
NODE=(default,TCPIP,x,2480)
/* SVC & CMD node for Listener (dtllst)
SVCNODE=(EEEE,12488)
CMDNODE=(EEEE,LISTENER,127.0.0.1,12488)
/* SVC & CMD node for Logger (pwxccl)
SVCNODE=(pwxccl_eeee,22488)
CMDNODE=(pwxccl_eeee,CONDENSE,127.0.0.1,22488)
/*
APPBUFSIZE=256000
COLON=:
COMPRESS=Y
CONSOLE_TRACE=Y
DECPOINT=.
DEFAULTCHAR=*
DEFAULTDATE=19800101
MAXTASKS=5
MSGPREFIX=PWX
NEGSIGN=-
PIPE=|
POLLTIME=1000
/* You have to create the “CAPT_PATH_DIR” directory!
CAPT_PATH=/PWX_HOME/ CAPT_PATH_DIR/
/* You have to create the “CAPT_XTRA_DIR” directory!
CAPT_XTRA=/PWX_HOME/ CAPT_XTRA_DIR/
/* LOGPATH is where startup log messages go
LOGPATH=/PWX_HOME/LOGS/
/* LOGPATH/PFX is where individual component logs go
/* see Message Log Options in PWX Reference Manual
TRACING=(PFX=ALT,FLUSH=10,FILENUM=99,VIEW=Y,APPEND=Y,SIZE=100,RECLEN=255)
/**************************************************************
/* Microsoft SQL Server capture & extract
/**************************************************************
/* CONN_NAME default – set to CAPX for extract sessions
CAPI_CONN_NAME=CAPXEEEE
/* TYPE=MSQL for MS SQL Server Capture
CAPI_CONNECTION=(NAME=MSQLEEEE,TYPE=(MSQL,
DISTSRV=10.00.00.00,
DISTDB=distribution1,
MULTIPUB=N,
/* DWFLAGS=,
MEMCACHE=65535))
/* TYPE=CAPX for Extract
/* DFLTINST must match instance name in PWX Navigator!
/* DFLTINST must also match DBID in PWXCCL.CFG!
CAPI_CONNECTION=(NAME=CAPXEEEE,TYPE=(CAPX,DFLTINST=DBOR000))
/**************************************************************
PWXCCL.CFG file for PWX Express CDC for Microsoft SQL:
/***************************************************************
/* PWX PWXCCL Configuration File
/***************************************************************
/* CONFIG: PWXCCL with SQL Server source
/***************************************************************
/* REPLACE THESE STRINGS:
/* MSQLEEEE the DFLTINST name used in DBMOVER.CFG
/* pwxccl_eeee the PWX Logger name used in DBMOVER.CFG
/* PWX_HOME the actual directory path for PWX Install
/* CONDENSE the subdirectory for CND and Checkpoint files
/***************************************************************
/* YOU CAN CHOOSE TO REPLACE THIS STRING:
/* MSQLEEEE the name of the TYPE=MSQL CAPI_CONNECTION
/* from DBMOVER.CFG
/***************************************************************
CONDENSENAME=pwxccl_eeee
DB_TYPE=MSS
/* DBID must match DFLTINST in DBMOVER.CFG
/* DBID & DFLTINST must match instance name in PWX Navigator!
DBID=DBOR000
/* UID (logon) and PWD (Password)to connect to MS-SQL Server
UID=UIDEEEE
/*PWD=Abc@1234
/* EPWD for Encrypted Password – if use this, don’t use PWD
EPWD=Xyz0987
/* CONN_OVR must point to TYPE=MSQL CAPI_CONNECTION in DBMOVER.CFG
CONN_OVR=MSQLEEEE
/* EXT_CAPT_MASK – where to store CND files, and first node of name
/* You have to create the “CAPTURE” directory!
EXT_CAPT_MASK=/PWX_HOME/ CAPTURE /CondenseO
/* how long to retain CDCT entries and CND files in days
COND_CDCT_RET_P=14
/* COLL_END_LOG 0==Continuous capture (normal) 1==batch capture
COLL_END_LOG=0
/* For PWX 8.6.1, NDW should always be 1
/* For PWX 9.x, NDW may be be 0
NO_DATA_WAIT=1
/* For PWX 8.6.1, NDW2 should be 60 less than FSV in seconds
/* For PWX 9.x, NDW2 should be the same as FFV (not FSV)
NO_DATA_WAIT2=10
/* FFV in seconds, should be set to customer latency requirements
FILE_FLUSH_VAL=10
/* FSC=M (minutes) FSC=R (records)
FILE_SWITCH_CRIT=M
/* FSV in minutes (FSC=M) or records (FSC=R)
FILE_SWITCH_VAL=10
/* CAPT_IMAGE: AI=AfterImageOnly BA=BeforeAndAfterImage
CAPT_IMAGE=BA
/* VERBOSE logging prints more stats
VERBOSE=Y
/* Overrides for Cold Start / Special Start
/* Ignored on Warm Start
SEQUENCE_TOKEN=0
RESTART_TOKEN=0
/************************************************************
Listener and Logger Steps:
1.Start the listener by going to the PWX directory PWX_HOME and execute the command in below format:
nohup dtllst EEEE CONFIG=/PWX_HOME/eeee/dbmover_eeee.cfg > /PWX_HOME/logs/eeee/start_listener.log &
Execute below command will display the listener running status.
ps -ef|grep dtllst|grep eeee
2.Start the logger by going to the PWX directory PWX_HOME and execute the command in below format:
nohup pwxccl coldstart=n cs=/PWX_HOME/eeee/pwxccl_eeee.cfg config=/PWX_HOME/eeee/dbmover_eeee.cfg > / PWX_HOME /logs/eeee/start_logger_eeee.log 2>&1 &
Note:
Coldstart=n – this will bring the data from the last processed condense file
Coldstart=y – this will bring all data from the beginning (chances to have duplicate data)
Execute the below command to check the logger status.
pwxcmd displayall -sv pwxccl_eeee
Execute below command will display the logger running status.
ps -ef|grep pwxccl|grep eeee
Note: Bring up the listener in server then make an entry in the dbmover.cfg file, installed in navigator and then execute the below steps.
Initially an entry should be made in dbmover configuration file before proceeding to the registration.
Registration Steps:
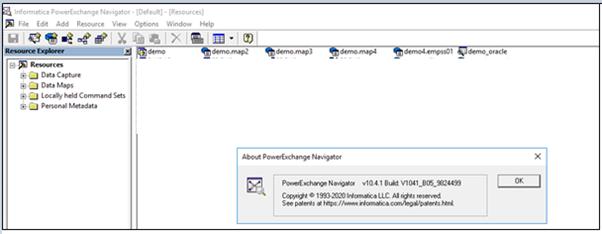
Step 1: Go to the Informatica PWX 10.4.1 tool. Click the PWX Navigator then page will be opened as in the below screenshot.
Step 2: Open the Data Capture tab à Registration group.
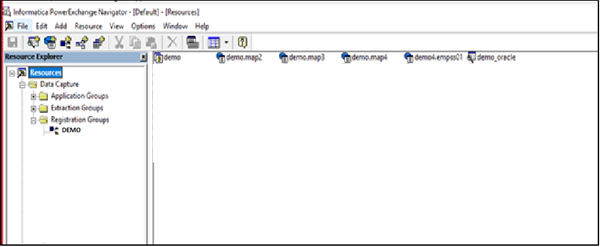
Step 3: Right click Registration group then add the Add Registration Group by entering the valid user id and password and click finish.
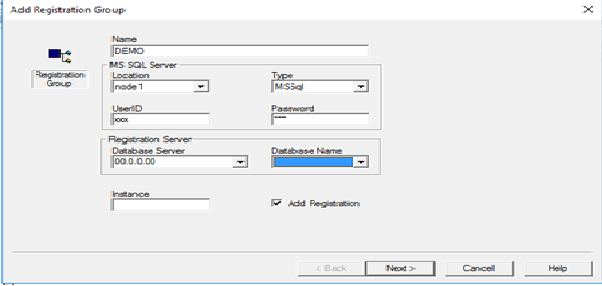
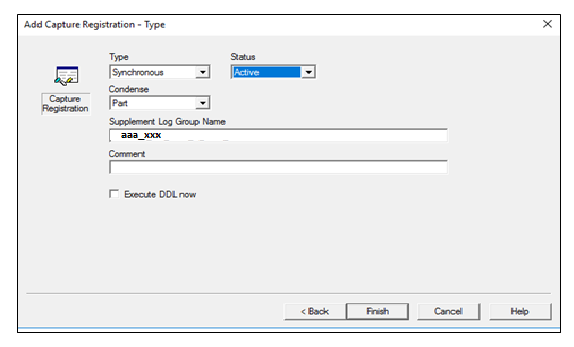
Step 4: Once authenticated, right click on Add Capture Registration, and give the details of Name, Schema and Table.
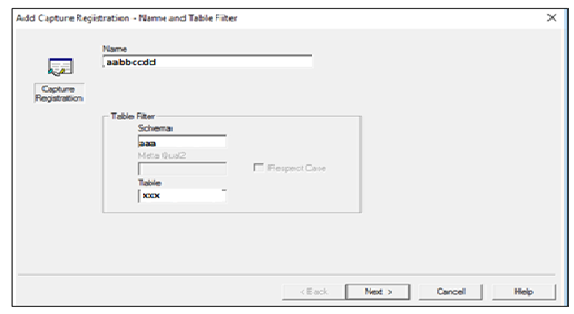
Note: The given topic name should be in 8 characters..
Fill the details and click next.
Step 5: Double click on the schema name.
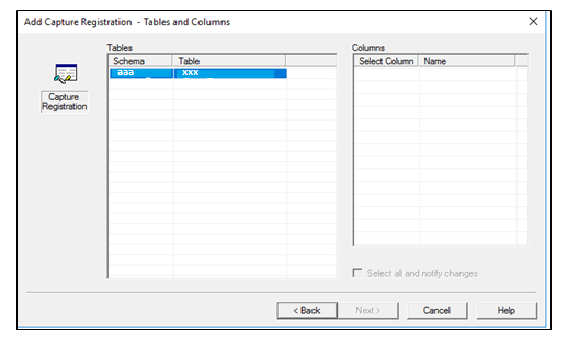
Step 6: Click on ‘Select All Columns’ and click next.
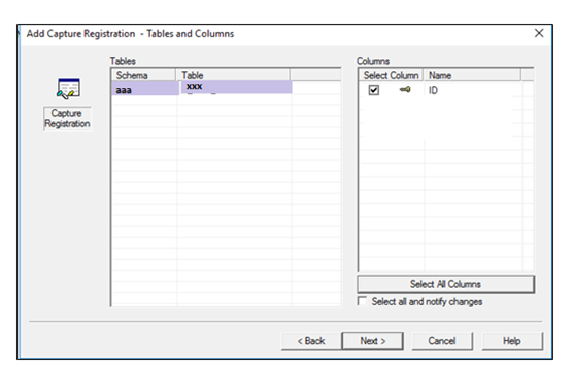
Step 7: Change the status to Active and click Finish.
Below Steps Access to be provided by DBA Admin team:
Step 1.System admin access need to be provided to register at least one table in the PWX Navigator tool then only publication will create the respective databases and need to be verified.
Step 2.Needs to provide the below access in XXXX user for necessary databases. Please refer below screenshot.
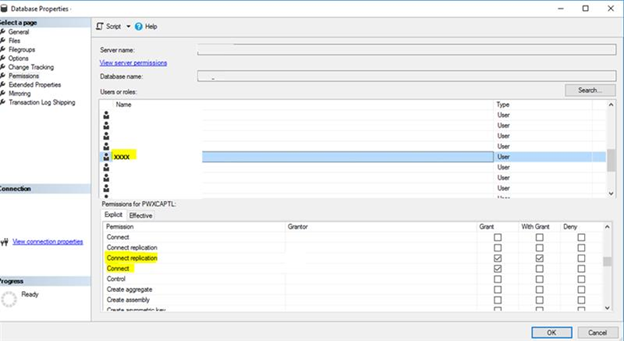
Step 3.Please provide the grant access in Security for the user of XXXX respective databases.
- grant connect to xxxx;
- grant connet replication to xxxx with grant option;
- db_datareader / db_owner / public;
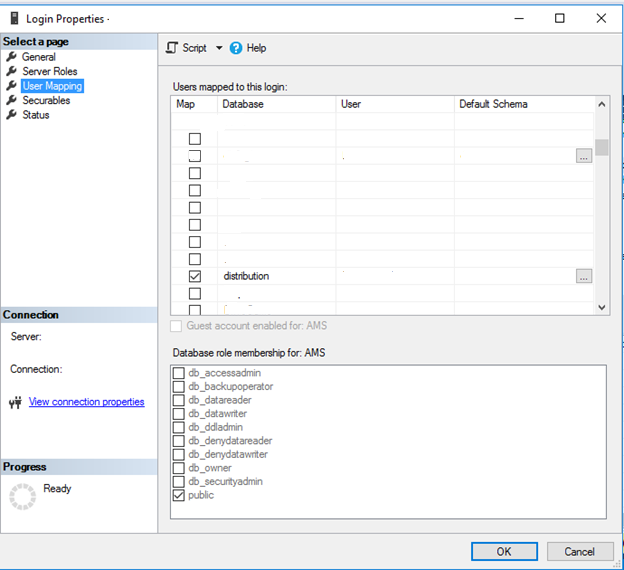 Step 4.Create Distribution Database and Enter the names under Distribution Database name.
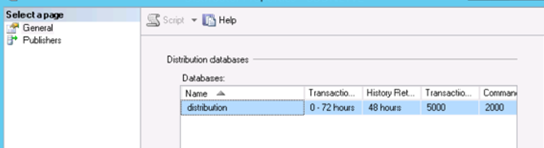
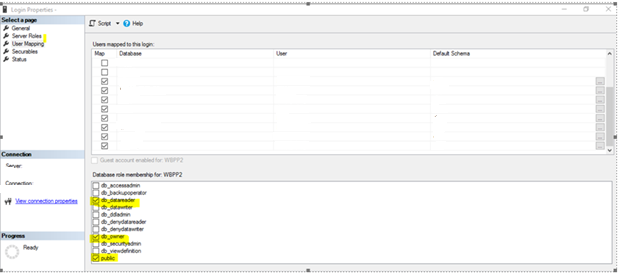
Step 5.Below Privileges are required for XXXX user.
- To run change data extractions against a SQL Server distribution database, you must have read access to the database. Need SELECT authority on the MSrepl_commands and MSrepl_transactions system tables in the distribution database. Since DBA role is provided this authorization will exist by default.
- Please remove old replication and publication in articles which is created by DBA team.
- Once the informatica admin team verified the replication/publication and revoke the access from sysadmin to database owner(dbo).
Row Testing:
One way to test your extraction mapping is by doing row test. This is done from the Extraction group.
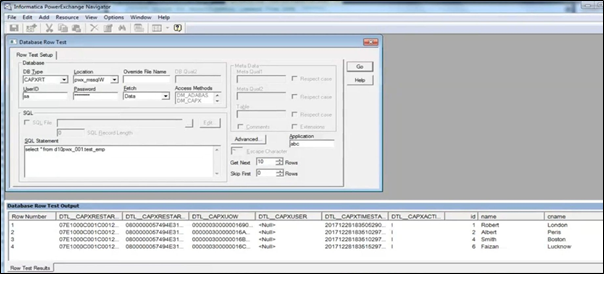
DTL__CAPXUSER: The username should be populated in this column.
Challenges with PWX CDC :
- Computed datatype columns are not supported.
- When there is a mass update in source, there will be huge CPU consumption and takes a longer time to read the condense file.
- If any new/modify/drop column action is carried out in source, then the table must be registered again, logger must be brought down and then brought up.
- Table registration is not possible when the table doesn’t have the primary key.
- CAPX__ROWID will not be populated.
PWX with CDC – Benefits:
- Access and deliver the data in “right time”.
- For audit and other purposes of keeping track of the deleted record CDC can be great help as the deleted record in source will be captured in dtl__capxaction=D in PWXCDC.
- It has the in-built feature for accessing the replication logs. So, when the tables are registered the replication logs will be executed internally in the tool.
Conclusion:
The PWX Change Data Capture (CDC) Option can satisfy our business requirements for up-to-the-minute data. PWX Change Data Capture (CDC) Option is available for all popular enterprise database systems, this Option is essential whenever you need timelier access to data. When combined with real-time data integration platform, event-driven data can be accessed, transformed, and cleansed continuously and used to drive business results in any enterprise, large or small. Please feel free to reach Cittabase for more information. Visit our blogs for more topics on Informatica.
References:
https://knowledge.informatica.com/