
- December 6, 2020
- Posted by: Sibi Elamparithi
- Category: APEX
In many cases, we have parent-child relationship data which needs to be represented in a hierarchical manner. There is no built-in report in APEX to represent these kinds of data. But alternatively, we can use Oracle Jet cookbook to build Hierarchical report with simple JSON data input.
Our final Hierarchical report is displayed as below,
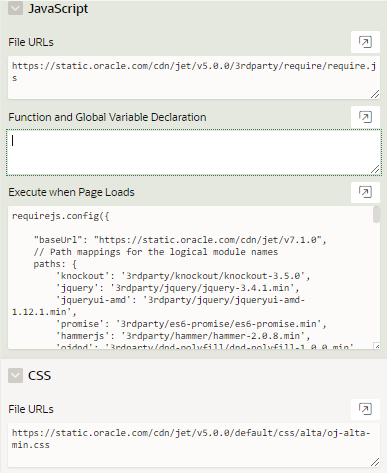
First step would be including the Require JS and Alta UI library for building the chart. Add the below URL under Javascript File URLs Section of the Page.
https://static.oracle.com/cdn/jet/v5.0.0/3rdparty/require/require.js
Add the below code to Execute when Page Load section of the Page.
requirejs.config({
“baseUrl”: “https://static.oracle.com/cdn/jet/v7.1.0”,
paths: {
‘knockout’: ‘3rdparty/knockout/knockout-3.5.0’, ‘jquery’: ‘3rdparty/jquery/jquery-3.4.1.min’, ‘jqueryui-amd’: ‘3rdparty/jquery/jqueryui-amd-1.12.1.min’, ‘promise’: ‘3rdparty/es6-promise/es6-promise.min’, ‘hammerjs’: ‘3rdparty/hammer/hammer-2.0.8.min’, ‘ojdnd’: ‘3rdparty/dnd-polyfill/dnd-polyfill-1.0.0.min’, ‘ojs’: ‘default/js/min’, ‘ojL10n’: ‘default/js/ojL10n’, ‘ojtranslations’: ‘default/js/resources’, ‘text’: ‘3rdparty/require/text’, ‘signals’: ‘3rdparty/js-signals/signals.min’, ‘customElements’: ‘3rdparty/webcomponents/custom-elements.min’, ‘proj4’: ‘3rdparty/proj4js/dist/proj4’, ‘css’: ‘3rdparty/require-css/css.min’, ‘touchr’: ‘3rdparty/touchr/touchr’ },
shim: { ‘jquery’: { exports: [‘jQuery’, ‘$’] } } });
Add the below URL under CSS File URLs Section of the Page.
https://static.oracle.com/cdn/jet/v5.0.0/default/css/alta/oj-alta-min.css
Next, we need to define our report headers. Create a static region for the report and add the below code.
<div id=”sampleDemo” style=”width: 1px; min-width: 100%;”>
<div id=’tableWrapper’>
<oj-table id=”table” aria-label=”Tasks Table” data=”[[datasource]]” row-renderer='[[KnockoutTemplateUtils.getRenderer(“row_template”, true)]]’
columns='[{“headerText”: “Employee Name”, “sortProperty”: “name”},
{“headerText”: “Job”, “sortProperty”: “resource”},
{“headerText”: “Hire Date”, “sortProperty”: “hiredate”},
{“headerText”: “Salary”, “sortProperty”: “sal”},
{“headerText”: “Department”, “sortProperty”: “deptno”}]’>
</oj-table>
<script type=”text/html” id=”row_template”>
<tr> <td><oj-row-expander context=”[[$context.rowContext]]”></oj-row-expander><span><oj-bind-text value=”[[$context.data.name]]”></oj-bind-text></span> </td><td><span><oj-bind-text value=”[[$context.data.job]]”></oj-bind-text></span> </td>
<td><span><oj-bind-text value=”[[$context.data.hiredate]]”></oj-bind-text></span></td><td> <span><oj-bind-text value=”[[$context.data.sal]]”></oj-bind-text></span> </td> <td> <span><oj-bind-text value=”[[$context.data.deptno]]”></oj-bind-text></span> </td></tr> </script> </div></div>
Since I am using EMP table to build the report, I have added five columns namely Employee Name, Job, Hire Date, Salary, Department Number to the above piece of code.
Next step would be defining the data to be displayed in the report. The data must be in a multi-dimensional JSON string. A sample as below,
var jsonData= `[ {
“id”:”7839″,“name”:”KING”,“job”:”PRESIDENT”,“hiredate”:”11/17/1981″,
“sal”:”5000″, “deptno”:”10″,“children”:[
{ “id”:”7698″, “name”:”BLAKE”, “job”:”MANAGER”,
“hiredate”:”05/01/1981″,“sal”:”2850″, “deptno”:”30″,
“children”:[ {“id”:”7499″, “name”:”ALLEN”, “job”:”SALESMAN”, “hiredate”:”02/20/1981″, “sal”:”1600″,“deptno”:”30″ },
{ “id”:”7521″,“name”:”WARD”, “job”:”SALESMAN”,
“hiredate”:”02/22/1981″, “sal”:”1250″, “deptno”:”30″} ] },
{“id”:”7782″, “name”:”CLARK”, “job”:”MANAGER”,“hiredate”:”06/09/1981″,
“sal”:”2450″, “deptno”:”10″ },
{“id”:”7566″,“name”:”JONES”,“job”:”MANAGER”, “hiredate”:”04/02/1981″,
“sal”:”2975″, “deptno”:”20″ }]}
]`;
You can store the json in a javascript variable as above or in a hidden item and use the value in the below javascript which needs to be called in the Page Load action.
Create a Dynamic Action with Event as Page Load and Action as Execute Javascript Code.
Add the below code to the Code Section,
require([‘knockout’, ‘ojs/ojbootstrap’, ‘ojs/ojflattenedtreedataproviderview’, ‘ojs/ojarraytreedataprovider’, ‘ojs/ojknockouttemplateutils’,
‘ojs/ojknockout’, ‘ojs/ojtable’, ‘ojs/ojrowexpander’],
function (ko, Bootstrap, FlattenedTreeDataProviderView,
ArrayTreeDataProvider, KnockoutTemplateUtils) {
function ViewModel() {
this.datasource = ko.observable();
this.KnockoutTemplateUtils = KnockoutTemplateUtils;
var arrayTreeDataProvider = new ArrayTreeDataProvider(JSON.parse(jsonData), { keyAttributes: ‘id’ });
this.datasource(new FlattenedTreeDataProviderView(arrayTreeDataProvider,
{ expanded: this.expanded }));
} Bootstrap.whenDocumentReady().then(
function () { ko.applyBindings(new ViewModel(), document.getElementById(‘tableWrapper’)); } );
});
Things to Note:
Adding Jet library CSS might increase your application default font size. You can use the below code in the Inline CSS section to make it normal.
a.t-Header-logo-link:visited{ color:#fff; }
html { font-size:60.5% }
Please feel free to reach Cittabase for more information.