
- August 13, 2023
- Posted by: Dinesh Babu
- Categories: GCP, Informatica, Informatica CDI, Snowflake
No Comments
This blog focus on Data ingestion using Informatica CDI from Google Cloud Storage into Snowflake.
The first step is setting up an account on all three platforms If you don’t have one.
Here are the links for signing up for the trial account:
- Informatica CDI – https://www.informatica.com/in/trials/cloud-data-integration.html
- GCP – https://cloud.google.com/
- Snowflake – https://signup.snowflake.com/
Adding connectors in Informatica CDI:
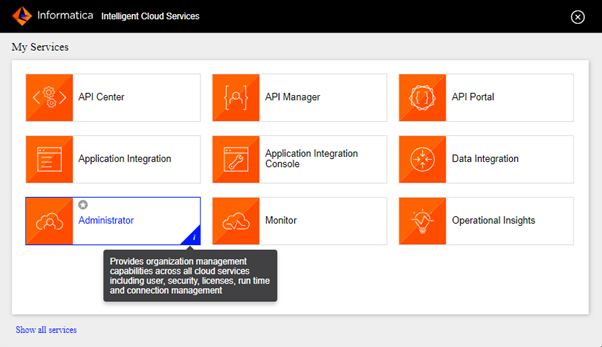
- Once the account setup is done, Login into Informatica and navigate to Administrator.
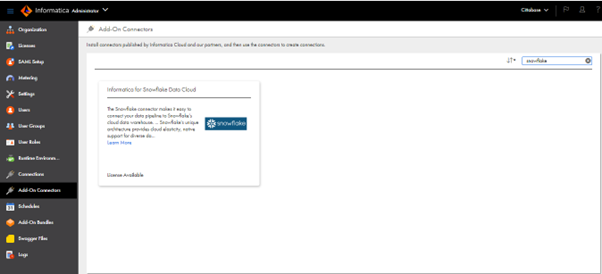
- Navigate to Add-On Connectors. Since Google Cloud Storage and Snowflake connectors are not provided by default. These add-ons must be added. These are available to use even in trial accounts.
- As per the following screenshots, there are connectors available for Google Cloud Storage and Snowflake whereas there are two connectors available for Google Cloud Storage alone. Any one of the connectors can be chosen as per the requirement. Here we are using the Google Cloud Storage V2 connector for this implementation. There are connectors available for other GCP Services as well.
- Since the connectors are already added, it is showing as License Available, or else the option will be Start Free Trail.

- Once the connectors are added, Go to Connection-> New Connection. In the Connection Type, now the new add-on connectors are listed.

Storage & Access Setup in GCP:
- Login into Google Cloud Console and create a new project.
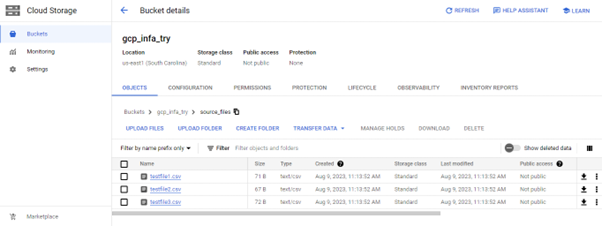
- Search for Cloud Storage and create a bucket.
- Provide the name of the Bucket and other configurations based on the requirements like where to store the data, storage class, access object, etc, and create the bucket.
- In the bucket (E.g. gcp_infa_try), Using the CREATE FOLDER option, Create a folder (E.g. source_files) and add a few CSV test files.
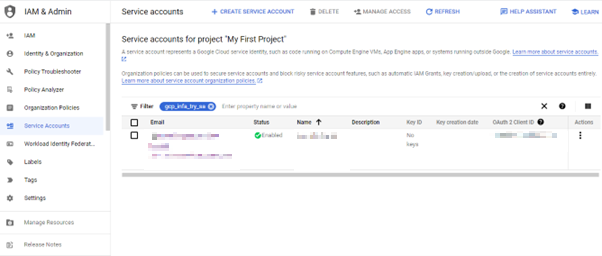
- Create a service account to access the files in the bucket and connect to Informatica.
- Search for Service Account in the search panel and Hit CREATE SERVICE ACCOUNT button.
- Provide the name for the Service Account and other configurations.
- To grant access to the Service Account. There is an option to select the role.
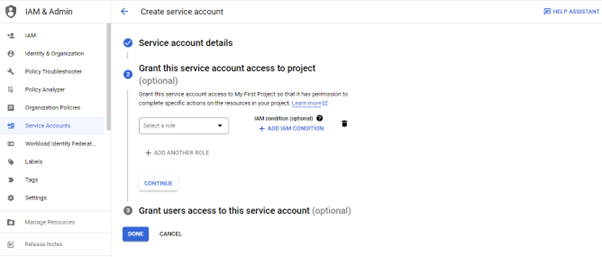
- Under Cloud Storage, Select the Storage Admin Role. It has full access to the buckets and objects.
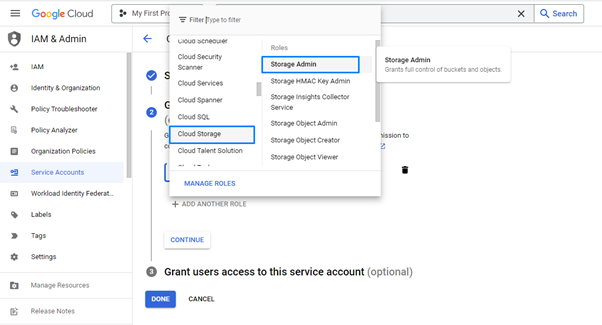
- Do the other configurations and create the Service Account.
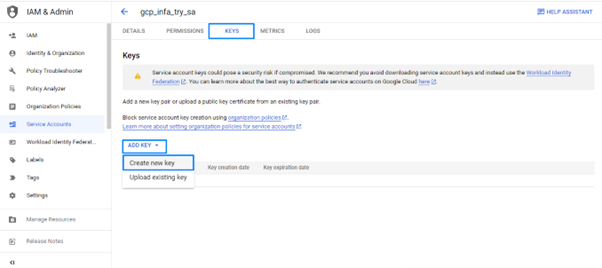
- To configure the Connection details in Informatica, the Key has to be created at the Service Account level.
- In the Service Account, Go to KEYS, Add Key-> Create New Key. This will be downloaded as a JSON file which has the connection details.
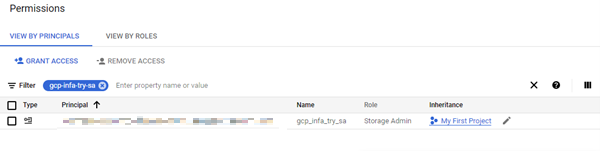
- Once the Service account setup is done. Verify once, whether the Service Account has got access to the bucket.
- One way of doing this is by checking the permission in the bucket where the service account must be listed down, like below.
- Another way is by running the below command in Cloud Shell using the JSON key file.
- gcloud auth activate-service-account SERVICE_ACCOUNT_EMAIL –key-file=/path/to/service-account-key.json
- gsutil ls gs://BUCKET_NAME
- Another way is by running the below command in Cloud Shell using the JSON key file.
Configuring the connectors in Informatica CDI:
Google Cloud Storage V2 Configuration:
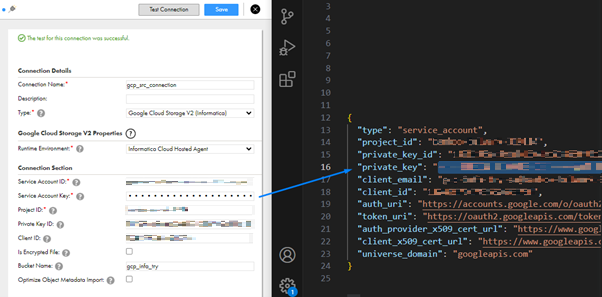
- Now using the JSON Key, create a new connection in Informatica CDI. Go to Informatica CDI->Administrator->Connections by selecting Google Cloud Storage V2 as the type.
- The below screenshot shows the connection configuration and key JSON values side by side. It’s pretty straightforward. Use the values provided within “ “.
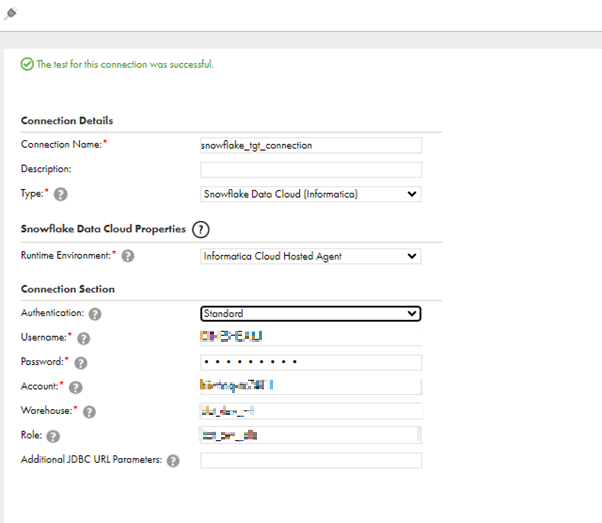
Snowflake Data Cloud Configuration:
- Below is the snippet of the Snowflake connection configuration in Informatica using Standard authentication.
- Account – The account can be taken from the Snowflake URL. If the URL is https://hiiwhnq-nc74811.snowflakecomputing.com then hiiwhnq-nc74811 will be account value.
- Username & Password – are the credentials used to login into Snowflake.
- Warehouse & Role – Provide the necessary Warehouse & Role as in Snowflake.
Connecting GCP & Snowflake with Informatica CDI:
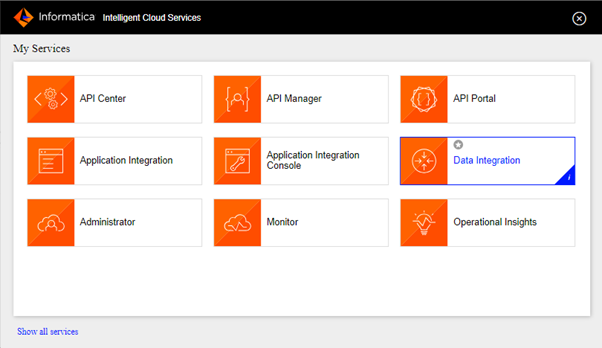
- Login to Informatica -> Data Integration
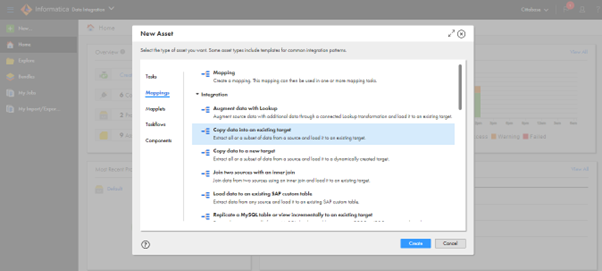
- Create a mapping to load data into the existing target table in Snowflake.
- Now the mapping is created. Click Source Transformation and under Source Properties -> Source. Select the created connection and source type. Select the created bucket, file, and format.
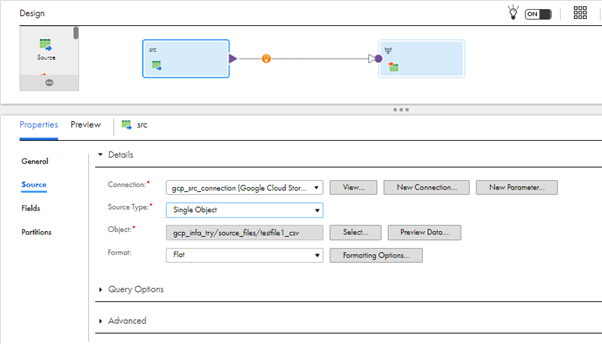
- In the Advance Properties, Mention the Google Cloud Storage Path and check the Is Directory check box to consume all the files from the directory.

- In the Fields, Incoming fields which are fetched from the selected file are visible. Make sure the files in the mentioned directory are in the same format with the same field names.

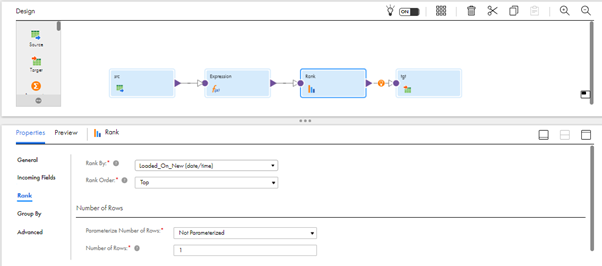
- Use Expression Transformation to convert the incoming String to Date and Rank Transformation to fetch only the latest transaction based on the ID field.
- Before configuring the target connection, Create the table structure in Snowflake which is to be in alignment with the source fields. Below is how one of the test files looks.
testfile1.csv:
| ID | Name | Current_Location | Loaded_On |
| 103 | Vignesh | Coimbatore | 05-08-2023 |
Creating Table Structure in Snowflake:
CREATE TABLE INF_SF_TGT
(ID NUMBER, NAME VARCHAR, CURRENT_LOCATION VARCHAR, LOADED_ON DATE);
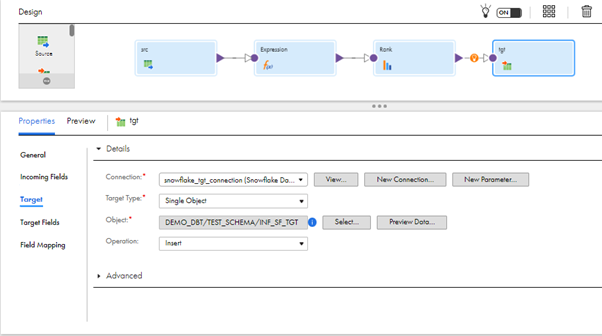
- Click the Target Transformation and under Target Properties -> Target. Select the Created Connection of Snowflake and Target Type and Select the created table in Snowflake.
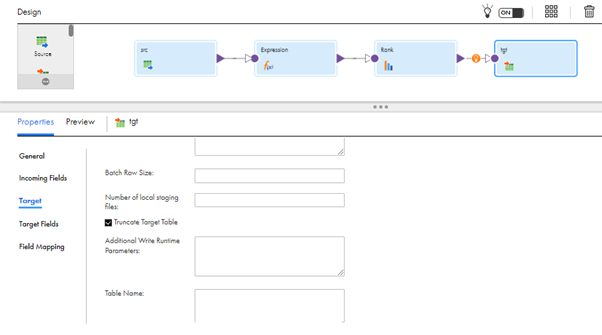
- To truncate the target table every time. Enable the Truncate Target Table check box Under Advance Properties.
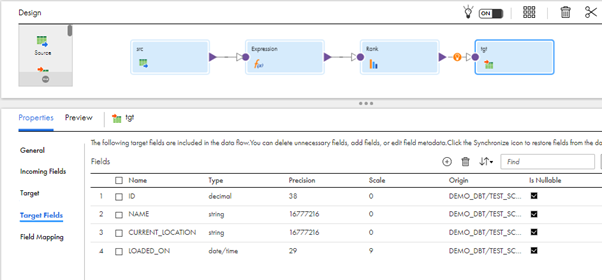
- Under Target Fields, we can see the field names, data types, etc of the configured target table.
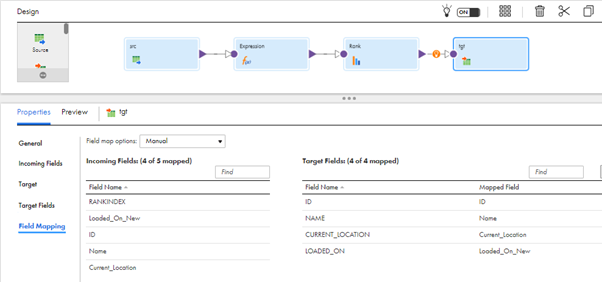
- In Field Mapping, Map the required fields to the target mapping.
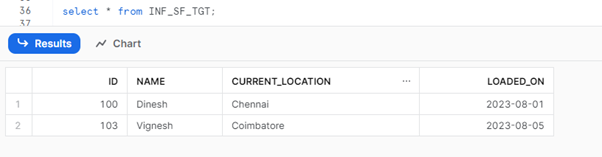
- Run the mapping and check the loaded data in the target Snowflake table.
Snowflake Result Set:
- Push another record to check whether the logic is working as expected.
Testfile4.csv:
| ID | Name | Current_Location | Loaded_On |
| 100 | Dinesh | Mumbai | 08-08-2023 |
- Place the file in the bucket and trigger the mapping again. On successful completion, verify whether the data is loading as expected in the target Snowflake table.
Snowflake Result Set:

That’s all.
To Summarise, we looked into:
- Adding Google Cloud Storage and Snowflake connectors in Informatica.
- Created Bucket and Service Account in GCP
- Using the Service Account key JSON Key file, configured Google Storage Connection
- Using the Snowflake Account Details, Configured Snowflake Connection in Informatica.
- Configured Source & Target to point to respective connections and used Expression and Rank Transformation to implement full load SCD Type 1 in Informatica.
IDMC provides a comprehensive platform for managing, scheduling, and monitoring your data integration tasks, ensuring smooth and efficient data loading processes.
Please feel free to reach Cittabase for more information. Visit our blogs for more topics on Informatica and Snowflake