- September 11, 2024
- Posted by: Samuel R
- Category: Informatica
Creating a connection between SharePoint and Informatica Intelligent Cloud Services (IICS) is crucial for seamless data integration and streamlined workflows. This integration enhances data accessibility, enabling organizations to leverage SharePoint’s collaborative capabilities alongside IICS’s robust data management and analytics tools, ultimately driving efficiency and informed decision-making.
Introduction
This blog explains how to create connection for SharePoint in IICS.
Below are SIX pieces of information required to create the SharePoint connection in IICS.
-
- Generate the client ID
- Generate the client secret
- Generate the bearer realm of your site.
- Generate the audience principal ID for post request
- Generate the authorization code
- Generate the refresh token
Generate the client ID and client secret:
Go to URL: https://www.office.com/apps/
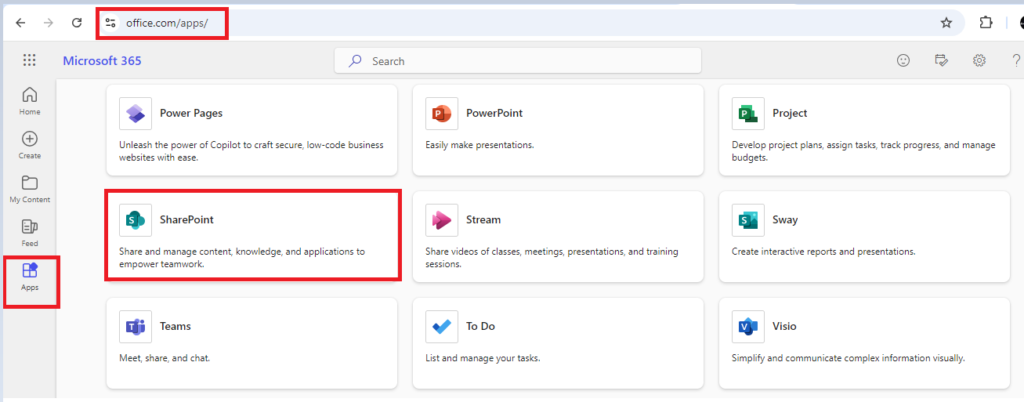
-
- Login to the Microsoft SharePoint and Click Create site

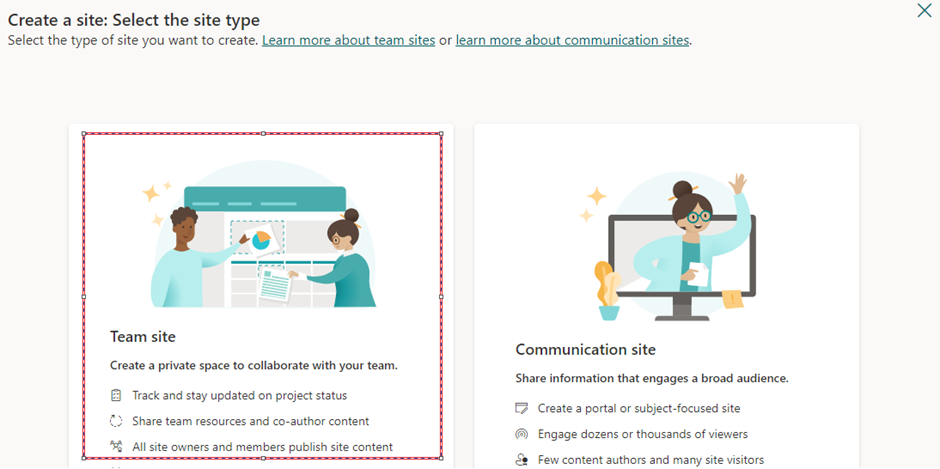
-
- Select the site type as Team site
· Select the Template of the SharePoint, for this demo, I am choosing standard template.
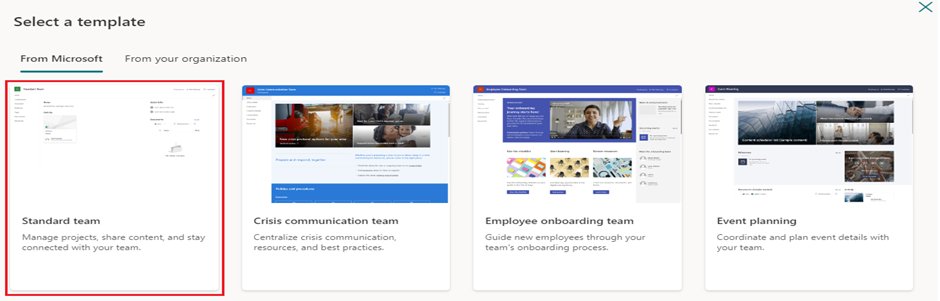
-
- Make sure the template preview and click Use Template
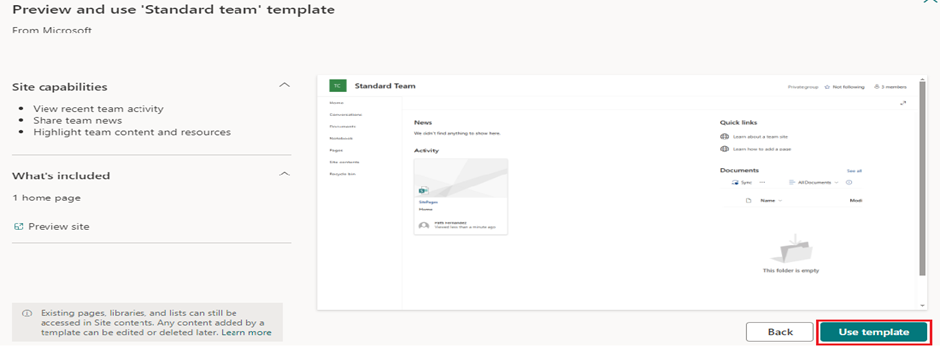
-
- Give the site name for your SharePoint
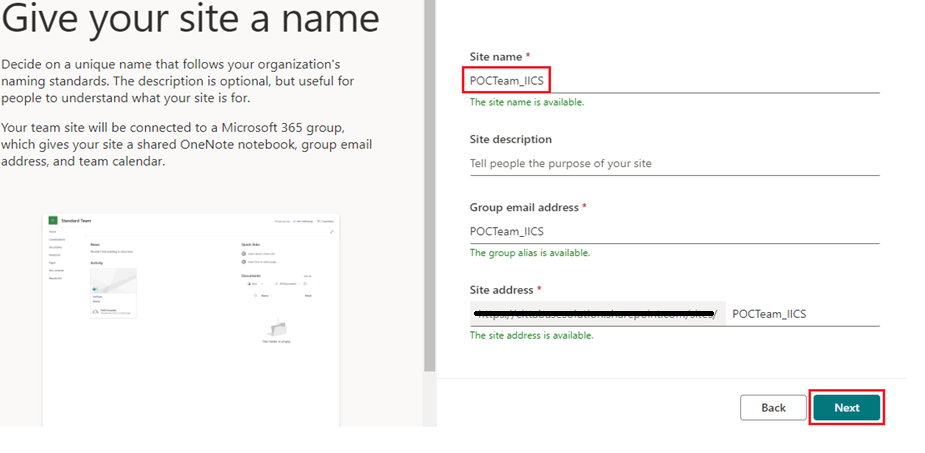
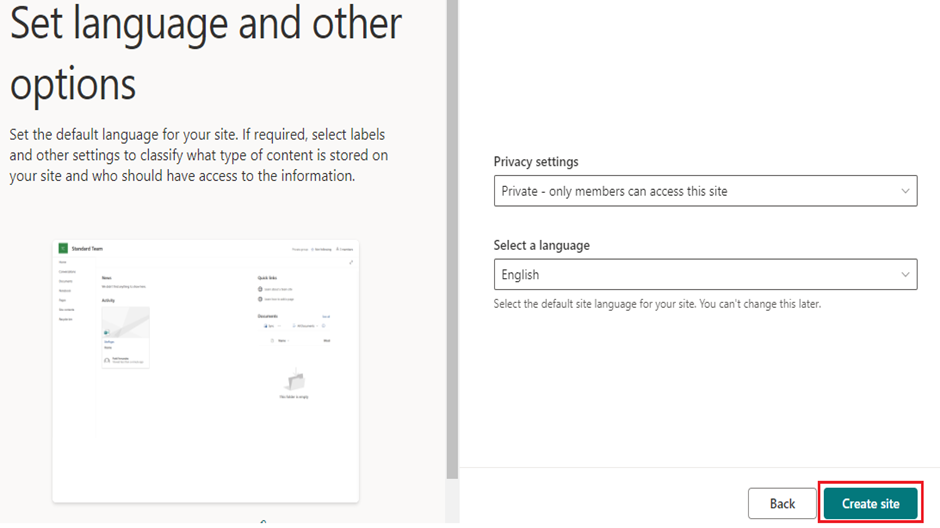
-
- Add the members, you would like to add and give the permission level for the same to the SharePoint
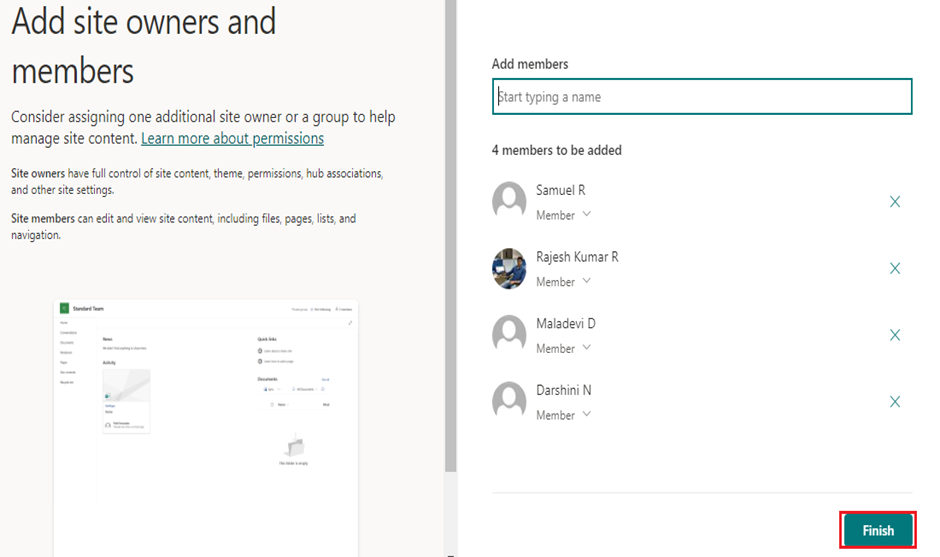
-
- Now go to the below URL: Replace highlighted text with your Site Name
https://<DomainName>.sharepoint.com/sites/<SITENAME>/_layouts/15/AppRegNew.aspx
-
- You will see the below page once you modify the above URL Domain Name and Site name
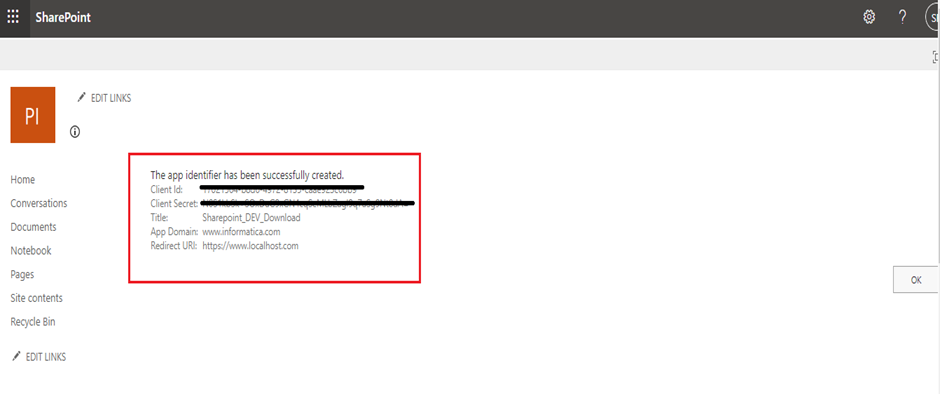
- Click Generate for generating Client ID & Client Secret
- Give the Title for your reference
- Give any sample App domain name, for demo, I gave www.informatica.com
- Click Create
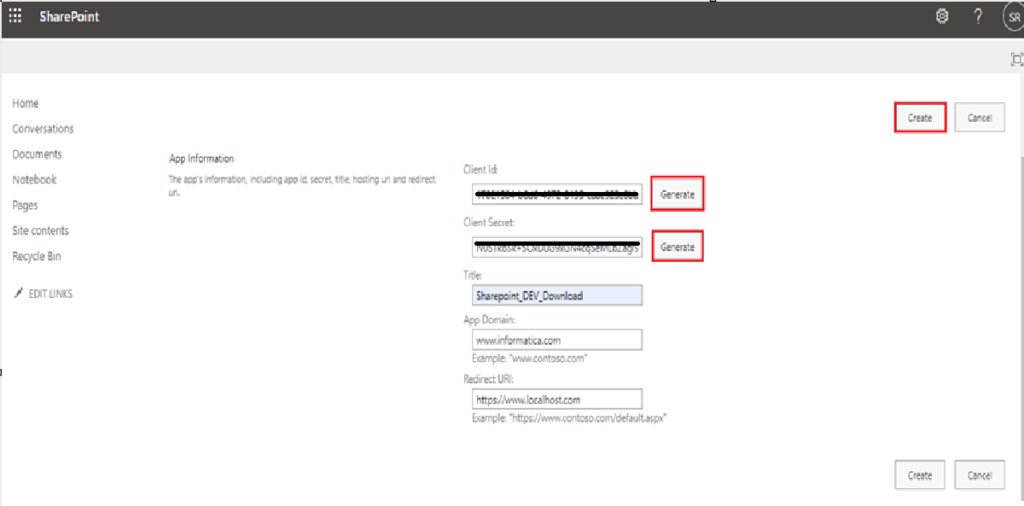
Once you click create, the below information will be generated, Copy the generated Client Id, Client Secret, Redirect URI for future connections reference.
Once you click create, the below information will be generated, Copy the generated Client Id, Client Secret, Redirect URI for future connections reference.
Generate the bearer realm & audience principal ID of your site:
-
- We must download and install the postman for generating the refresh token.
- Use the below URL to download the Postman in your windows machine.
https://www.filepuma.com/download/postman_64bit_10.19.7-36842/
-
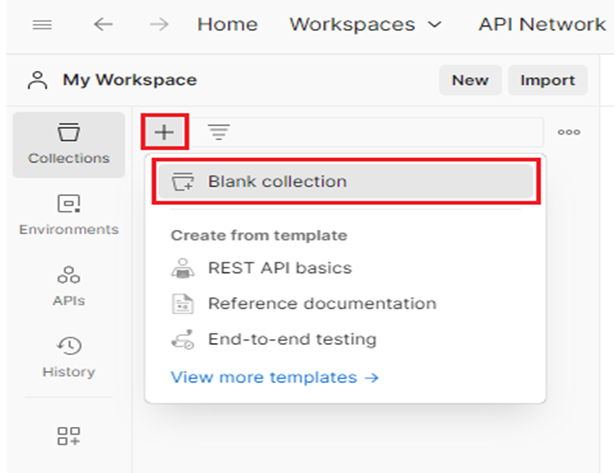
- Once the installation is completed, you will see the user interface like below as mentioned in screenshot.
- Click the Plus Icon to Create new collection and click Blank collection.
-
- Click Add a request

-
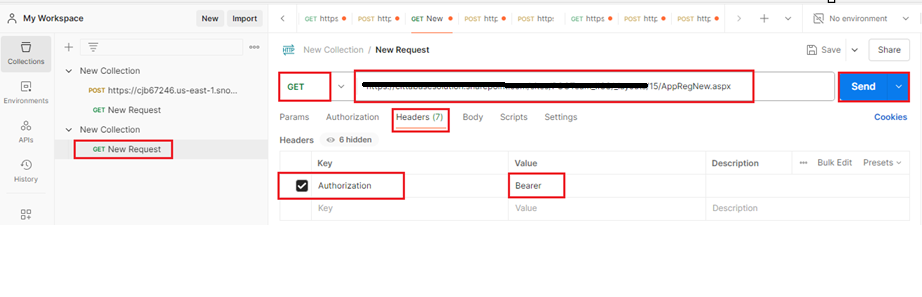
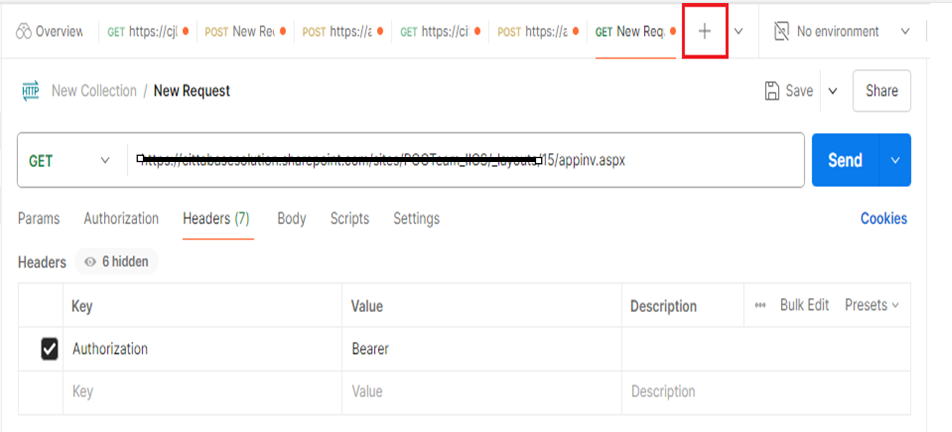
- Once you click the new request, make sure it is in GET request mode as mentioned in screenshot.
- Now paste the below URL based on your domain name and site name in GET request tab.
<a href=”https://<DomainName>.sharepoint.com/sites/https://<DomainName>.sharepoint.com/sites/<SITENAME>/_layouts/15/AppRegNew.aspx
-
- Go to Header Tab and mention the Key, Value as mentioned in screenshot.
Key – Authentication
Value – Bearer
-
- Click Send
-
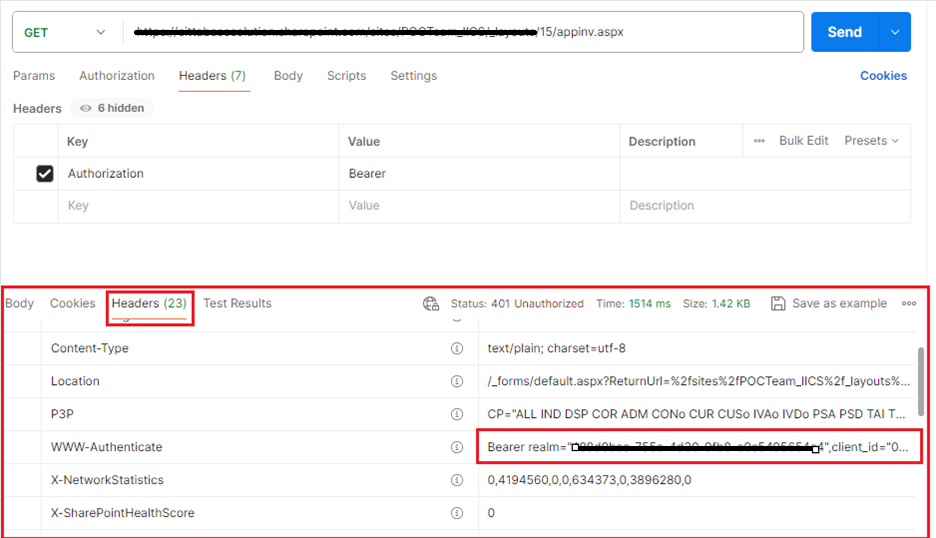
- Once you click Send, you will get the Bearer realm & audience principal ID (Client ID) details in straight of WWW-Authenticate, copy and keep Bearer realm & audience principal ID (Client ID) information for future steps.
-
- Now use the below URL to generate the Authorization code
- CLIENT_ID you must use in this URL which you taken while creating the SharePoint.
<a href=”https://<DomainName>.sharepoint.com/sites/<SITENAME>/_layouts/15/OAuthAuthorize.aspx?client_id=https://<DomainName>.sharepoint.com/sites/<SITENAME>/_layouts/15/OAuthAuthorize.aspx?client_id=<CLIENT_ID>&scope=Web.Write&response_type=code&redirect_uri=https://www.localhost.com
-
- You will get the below option while the run the URL in browser for trust the site, Click Trust it
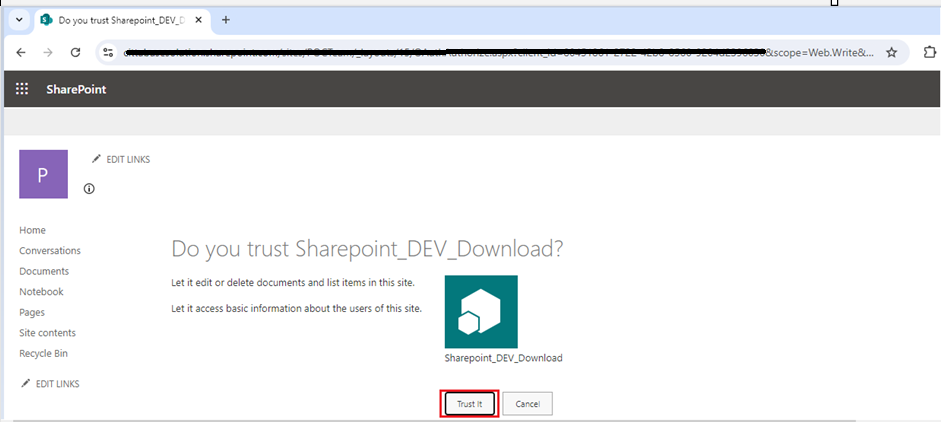
-
- You will route into the Site cannot be reached page, no worries, just we run the URL to generate the code Authorization code, so copy the code alone from the URL page and keep the information for future steps.

-
- Click the plus Icon for POST request
-
- Once you click the plus Icon, keep the request mode as POST
- Use the below URL after modifying the bearer realm values which you got in your previous step
<a href=”https://accounts.accesscontrol.windows.net/https://accounts.accesscontrol.windows.net/<bearer_realm/tokens/OAuth/2
-
- Go to Header Tab and add the value as mentioned in screen shot.
Key – Content-Type
Value – application/x-www-form-urlencoded

-
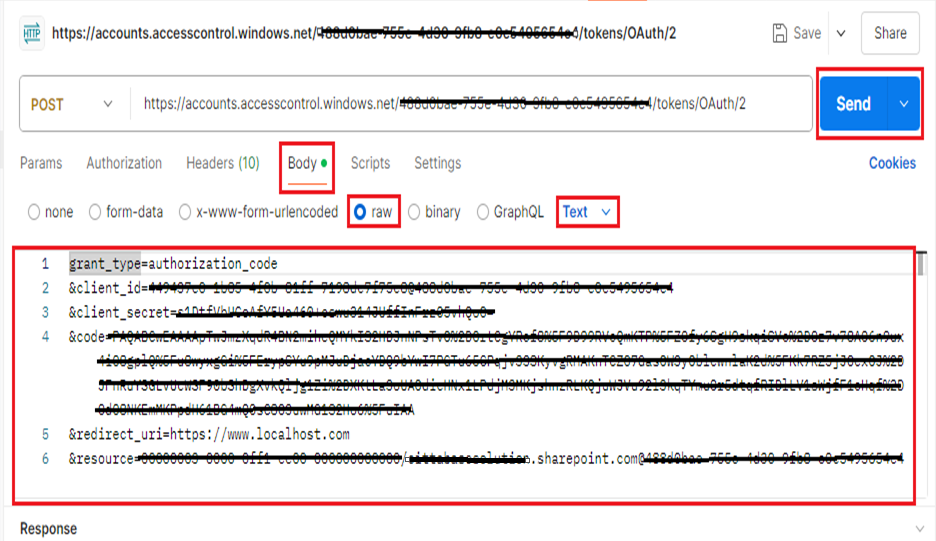
- After updated the Header Tab, Go to Body Tab
- Click the raw menu and change the format as Text
- Copy the below set of Text after modified the required information
grant_type=authorization_code
&client_id=<client_id>@<bearer_realm>
&client_secret=<client_secret>
&code=<Authorization_code>
&redirect_uri=<redirect_url> &resource=<audience principal ID>/<site_host>@<bearer_realm>
-
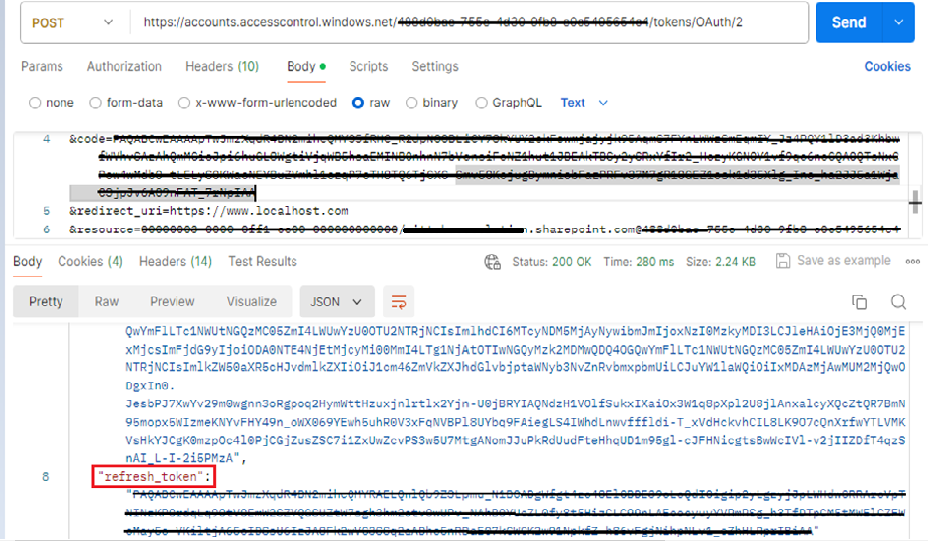
- Click Sent
-
- Once you click Send, refresh token will be generated as mentioned in screen shot
-
- Now we got the required information which required to create the SharePoint online IICS connection
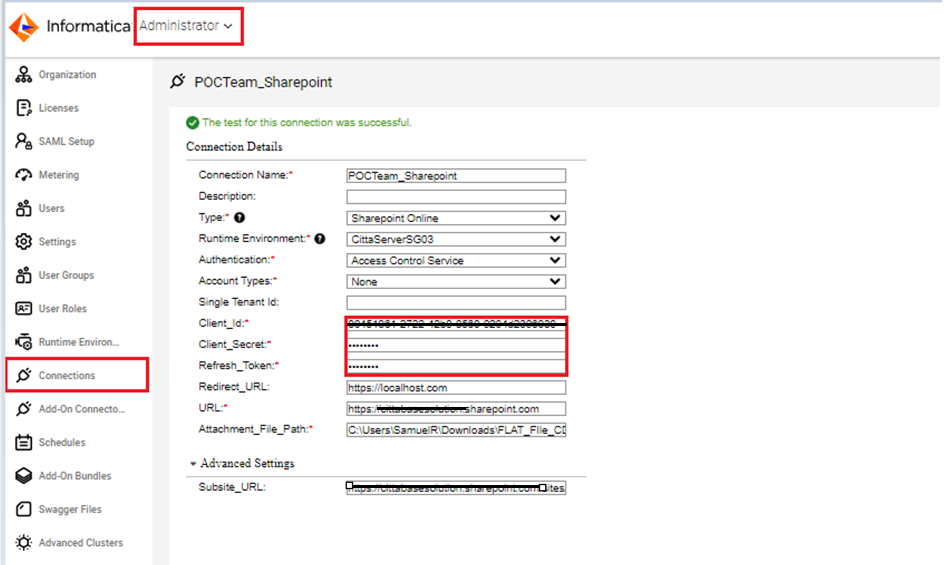
- Login to IICS -> Administrator -> Connections -> New Connection
- Connection Name – Name of the connection, each connection name must be unique within the organization.
- Type – Sharepoint Online
- Runtime Environment – The name of the runtime environment where you want to run tasks.
- Authentication – Access Control Service
- Account Types – None
- Use the Client ID and Client Secret which you generated while you are creating the SharePoint.
- Use the refresh token which you generated in postman.
- Redirect_URL – https://localhost.com
- URL – https://<DomainName>.sharepoint.com
- Attachment_File_Path – Directory on the Secure Agent machine where you want to download or attach files to Microsoft SharePoint Online.
- In Advanced settings, Subsite_URL – https://<DomainName>.sharepoint.com/sites/<SITENAME>
- After fill all the information, click Test Connection
- Once the Test Connection is successful, Click Save to save the connection
Conclusion:
By following these steps, you’ll establish a connection between IICS and SharePoint, enabling efficient data integration and management
“Please reach out to us for your Informatica solution needs. We are an Informatica Platinum Partner with extensive experience with Informatica implementations and data integration.”
Contact us – cittabase
A post from admin@2024 on cittabase provided by: https://www.cittabase.com